
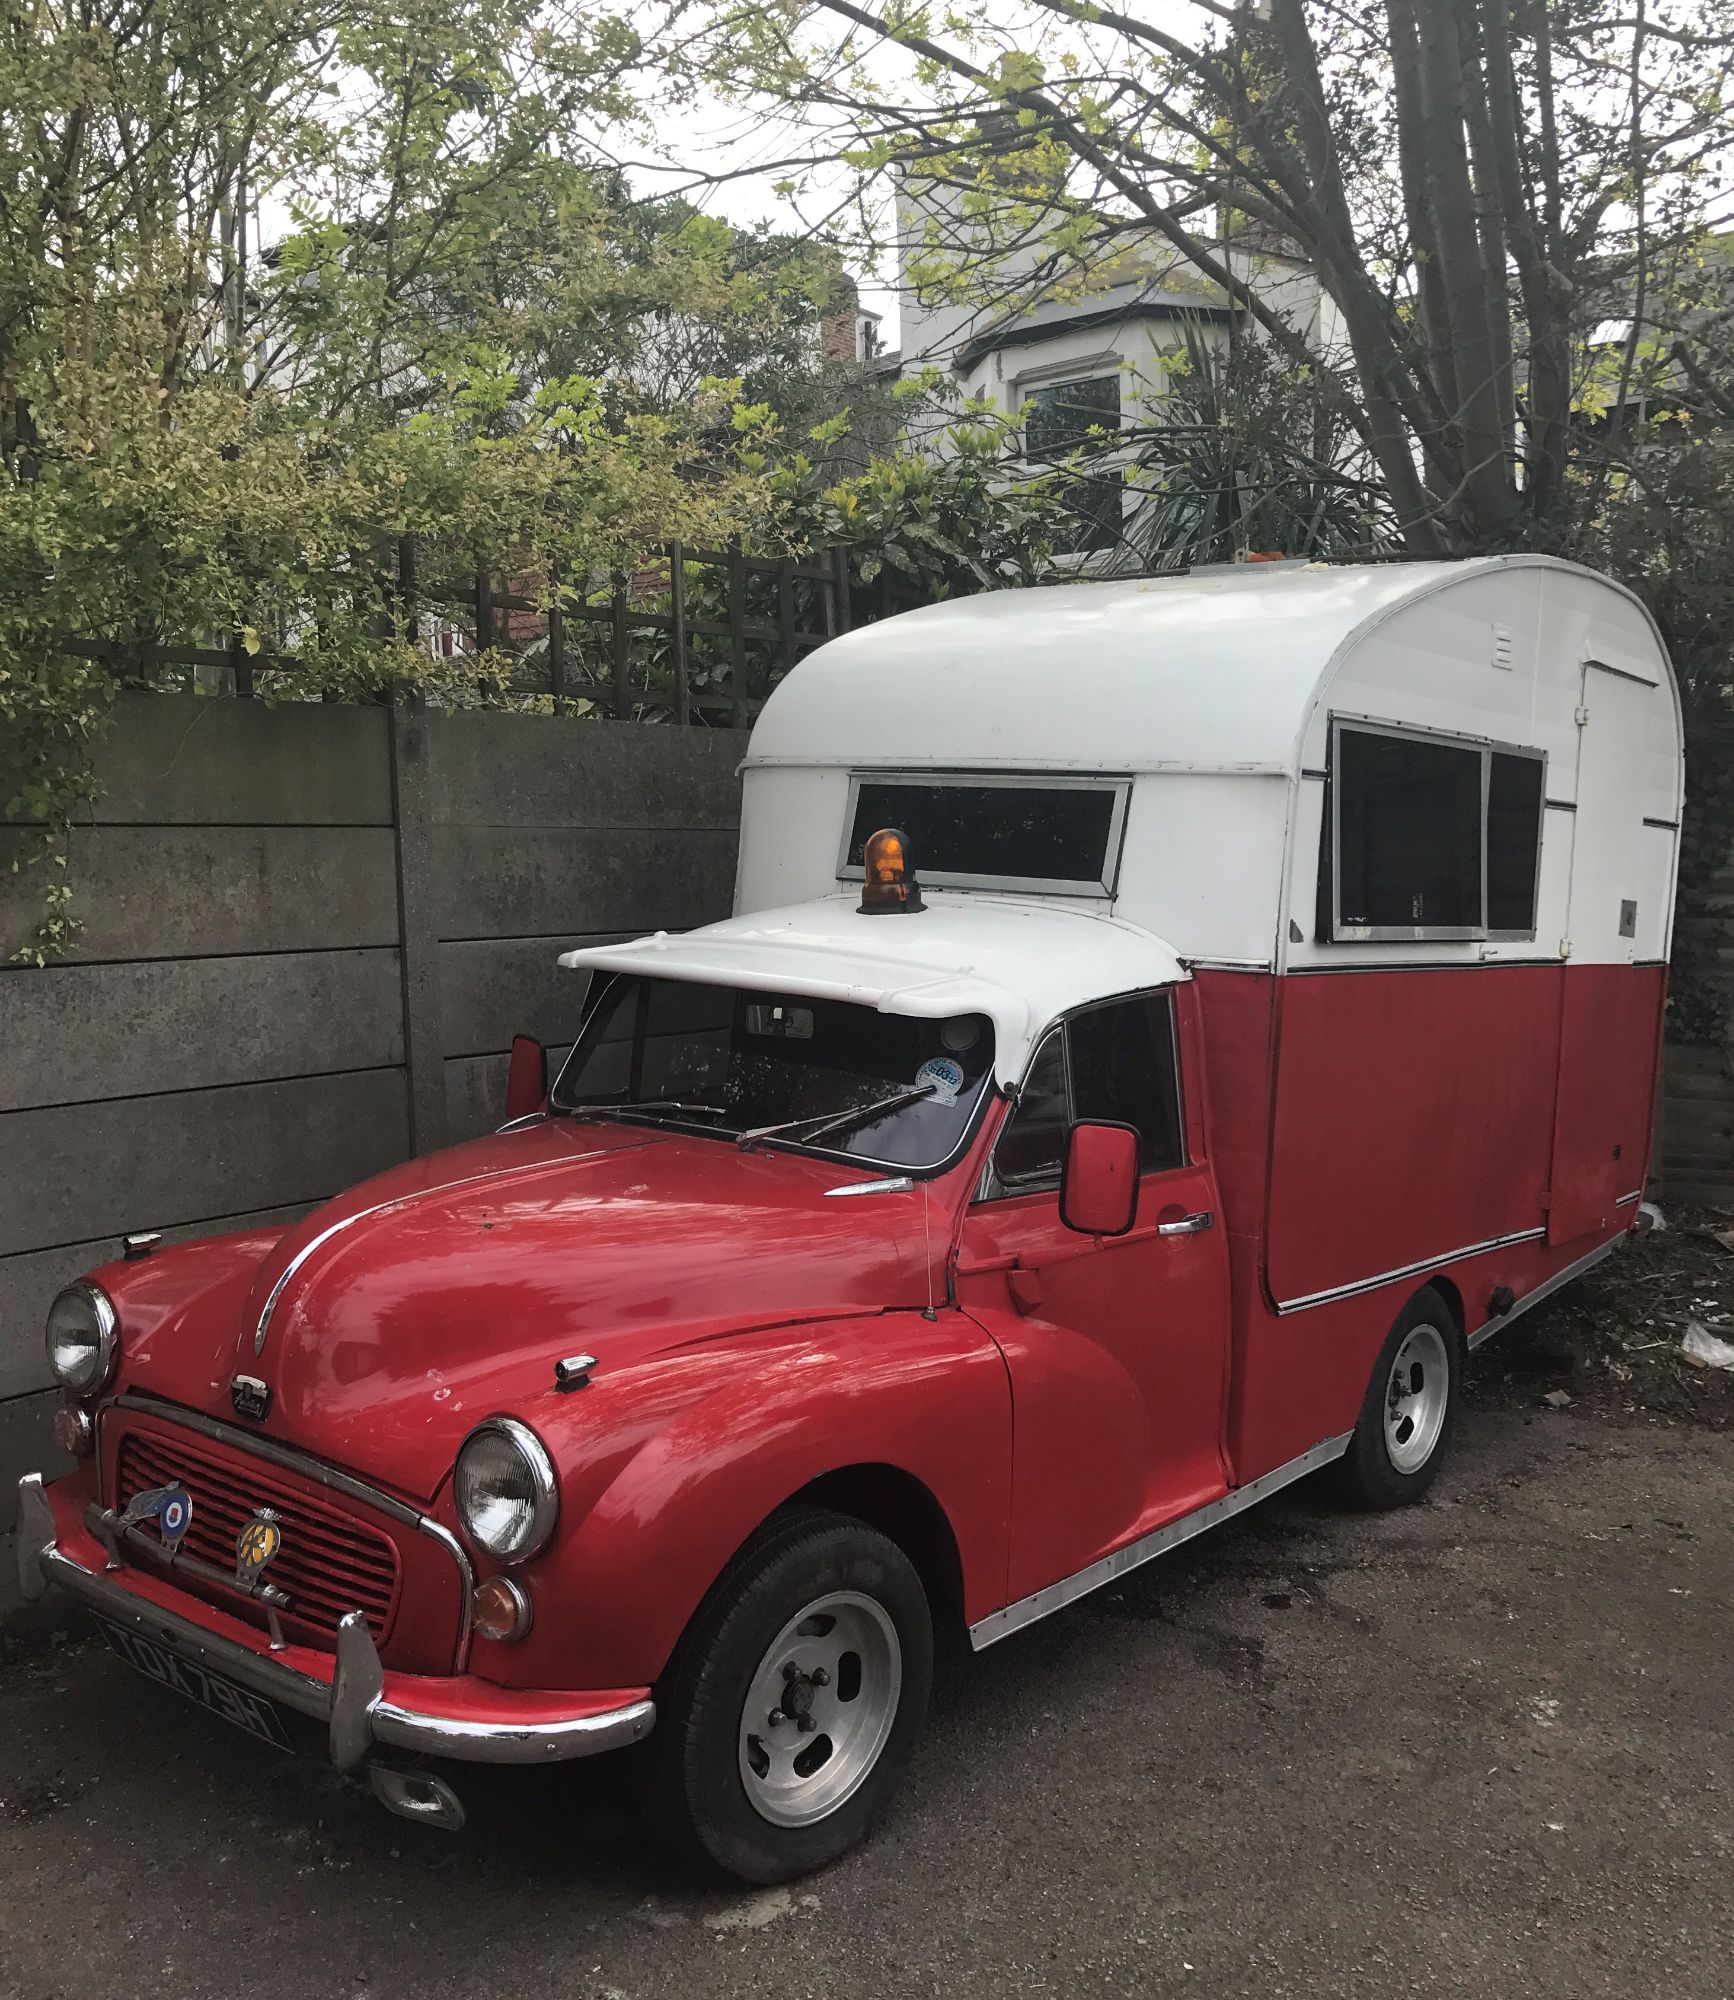
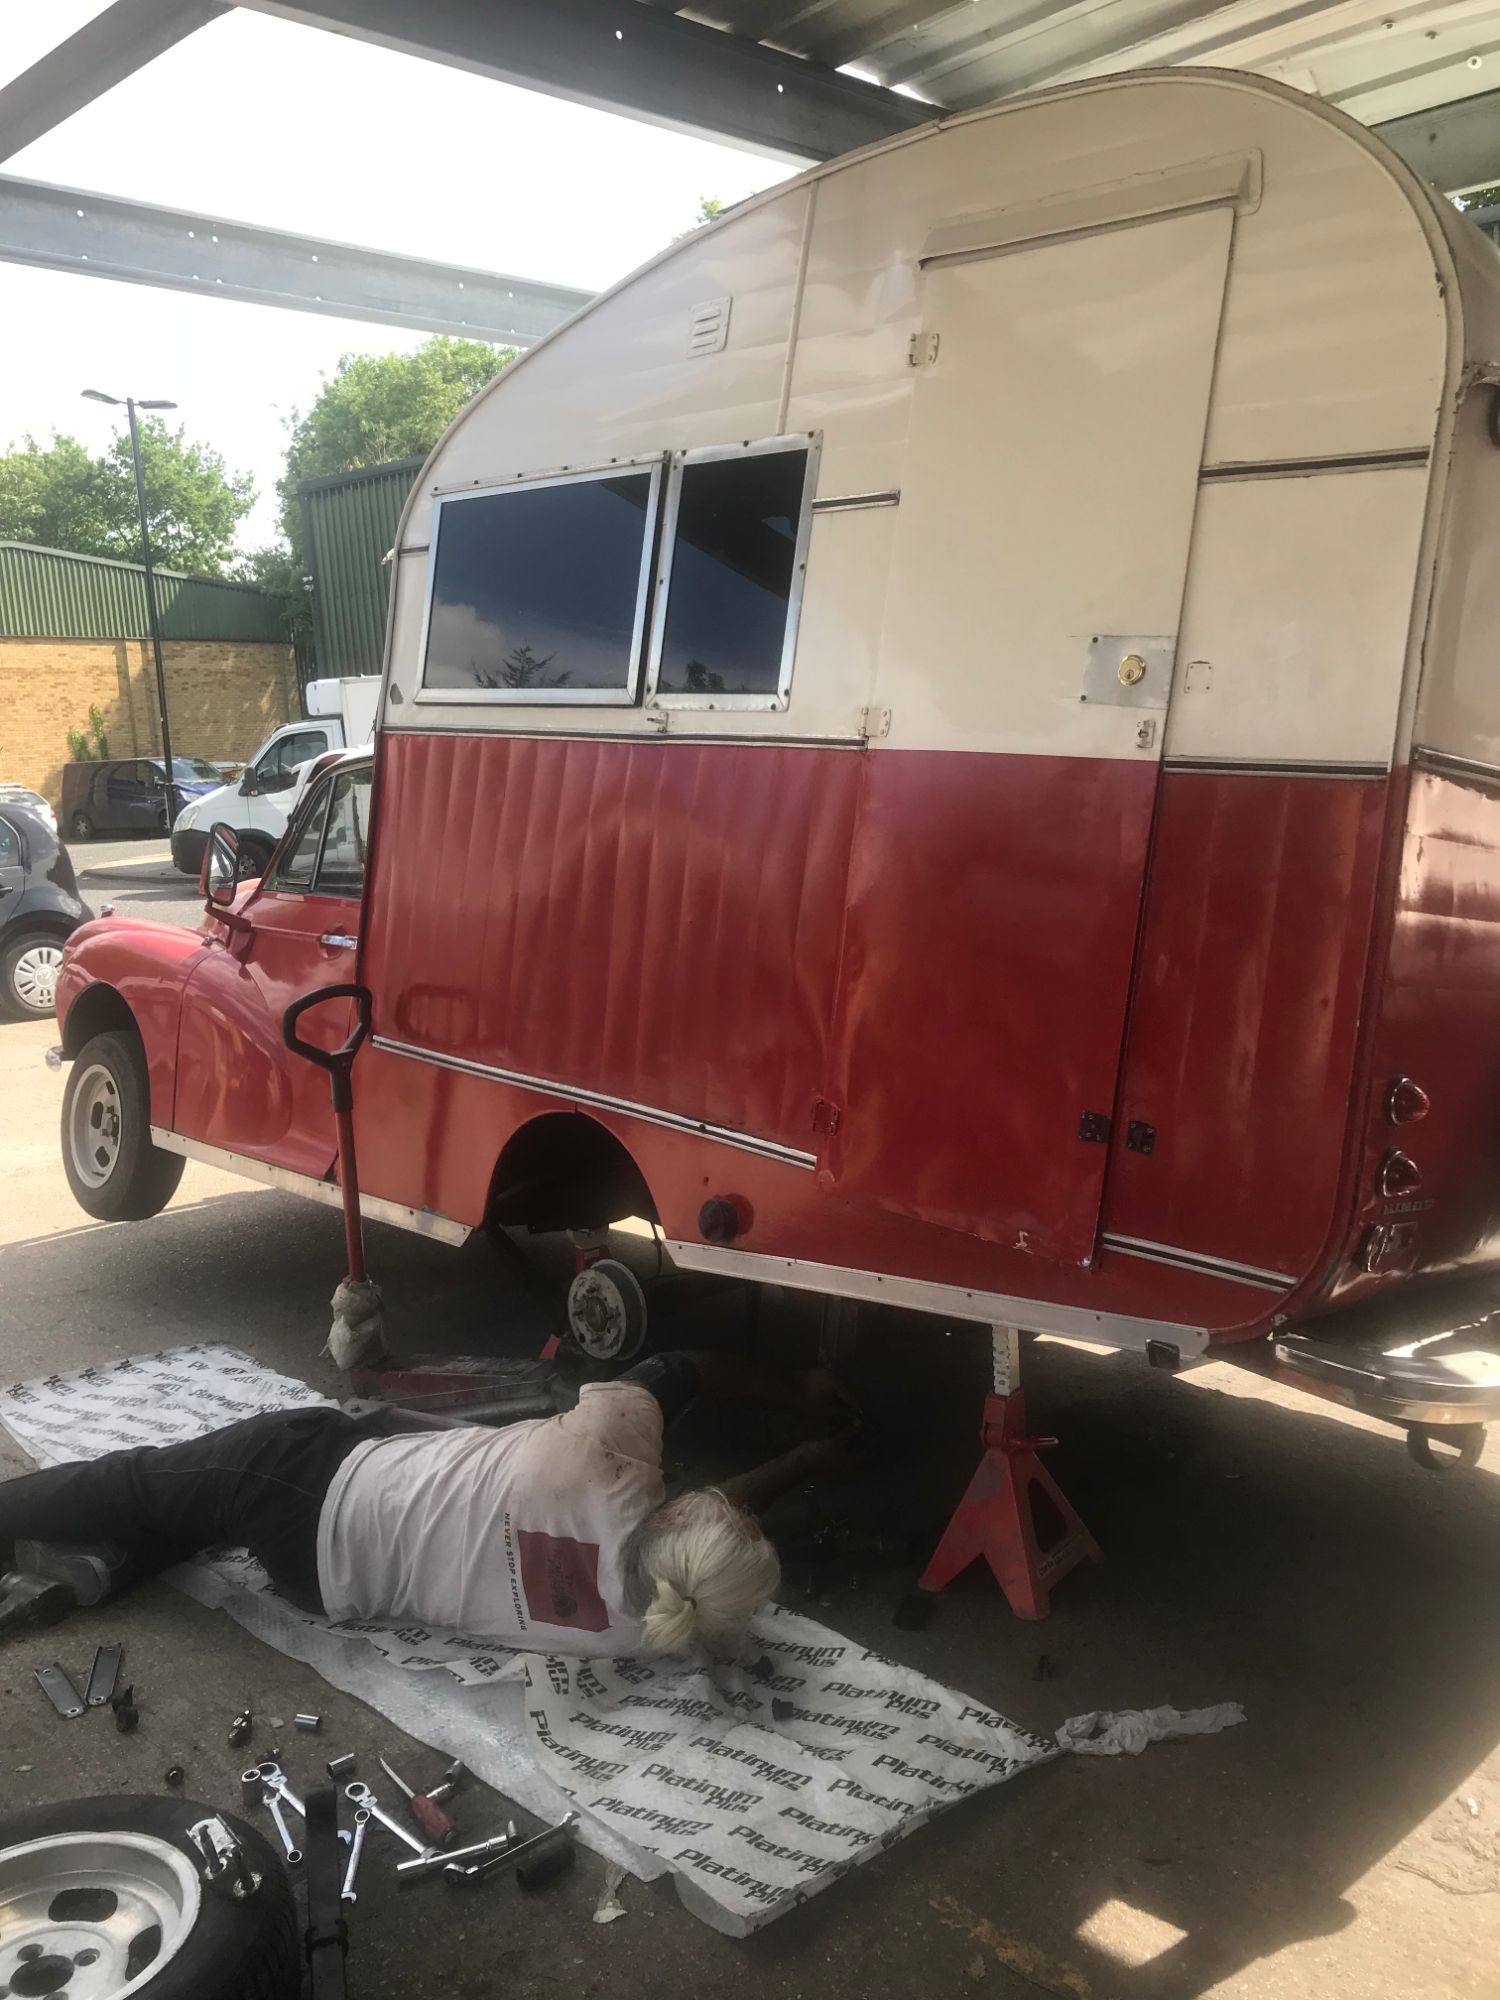
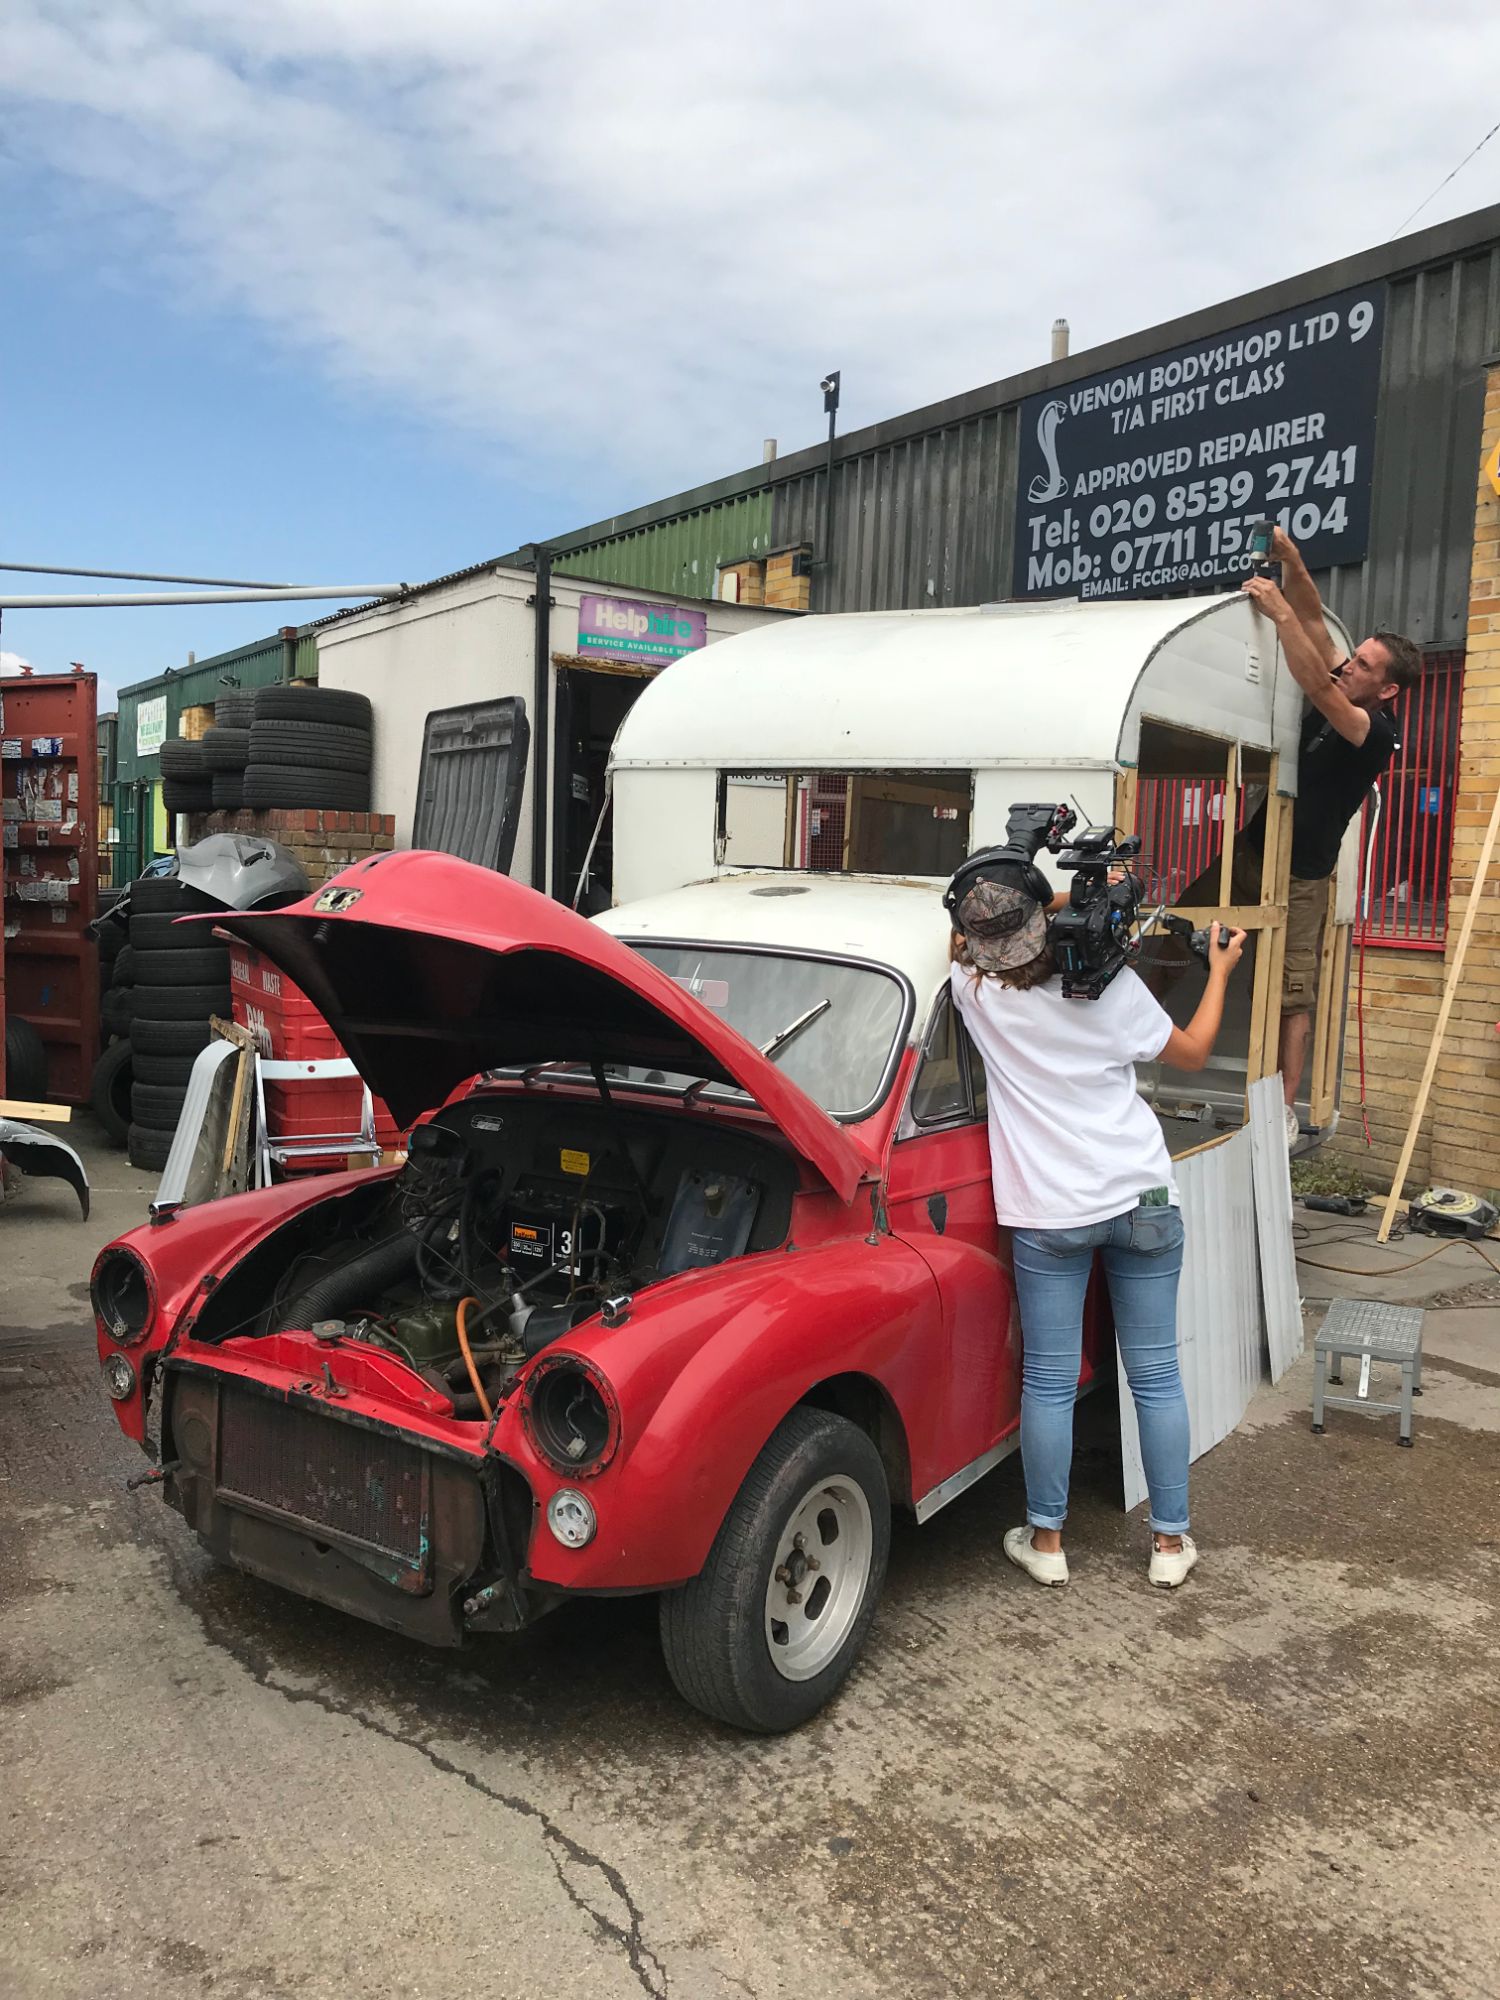
bodywork and sub-frame
I knew that the rear of Billy needed lifting to level it, and that I needed to close gaps where the caravan body joined the front cab.
I started by working on the suspension, and achieved some levelling by fabricating new, longer shackles for the leaf springs. And to further level the rear I was going to use angle irons and hardwood beams to strengthen and reinforce the uprights and caravan floor.
So for a while, it all seemed to be going to plan.
But the biggest obstacle was yet to come - the discovery that Billy's restoration was no longer a 'repair and re-fit at the back, and touch-up at the front', In reality, I was facing a complete re-build!
THE CALM BEFORE THE STORM
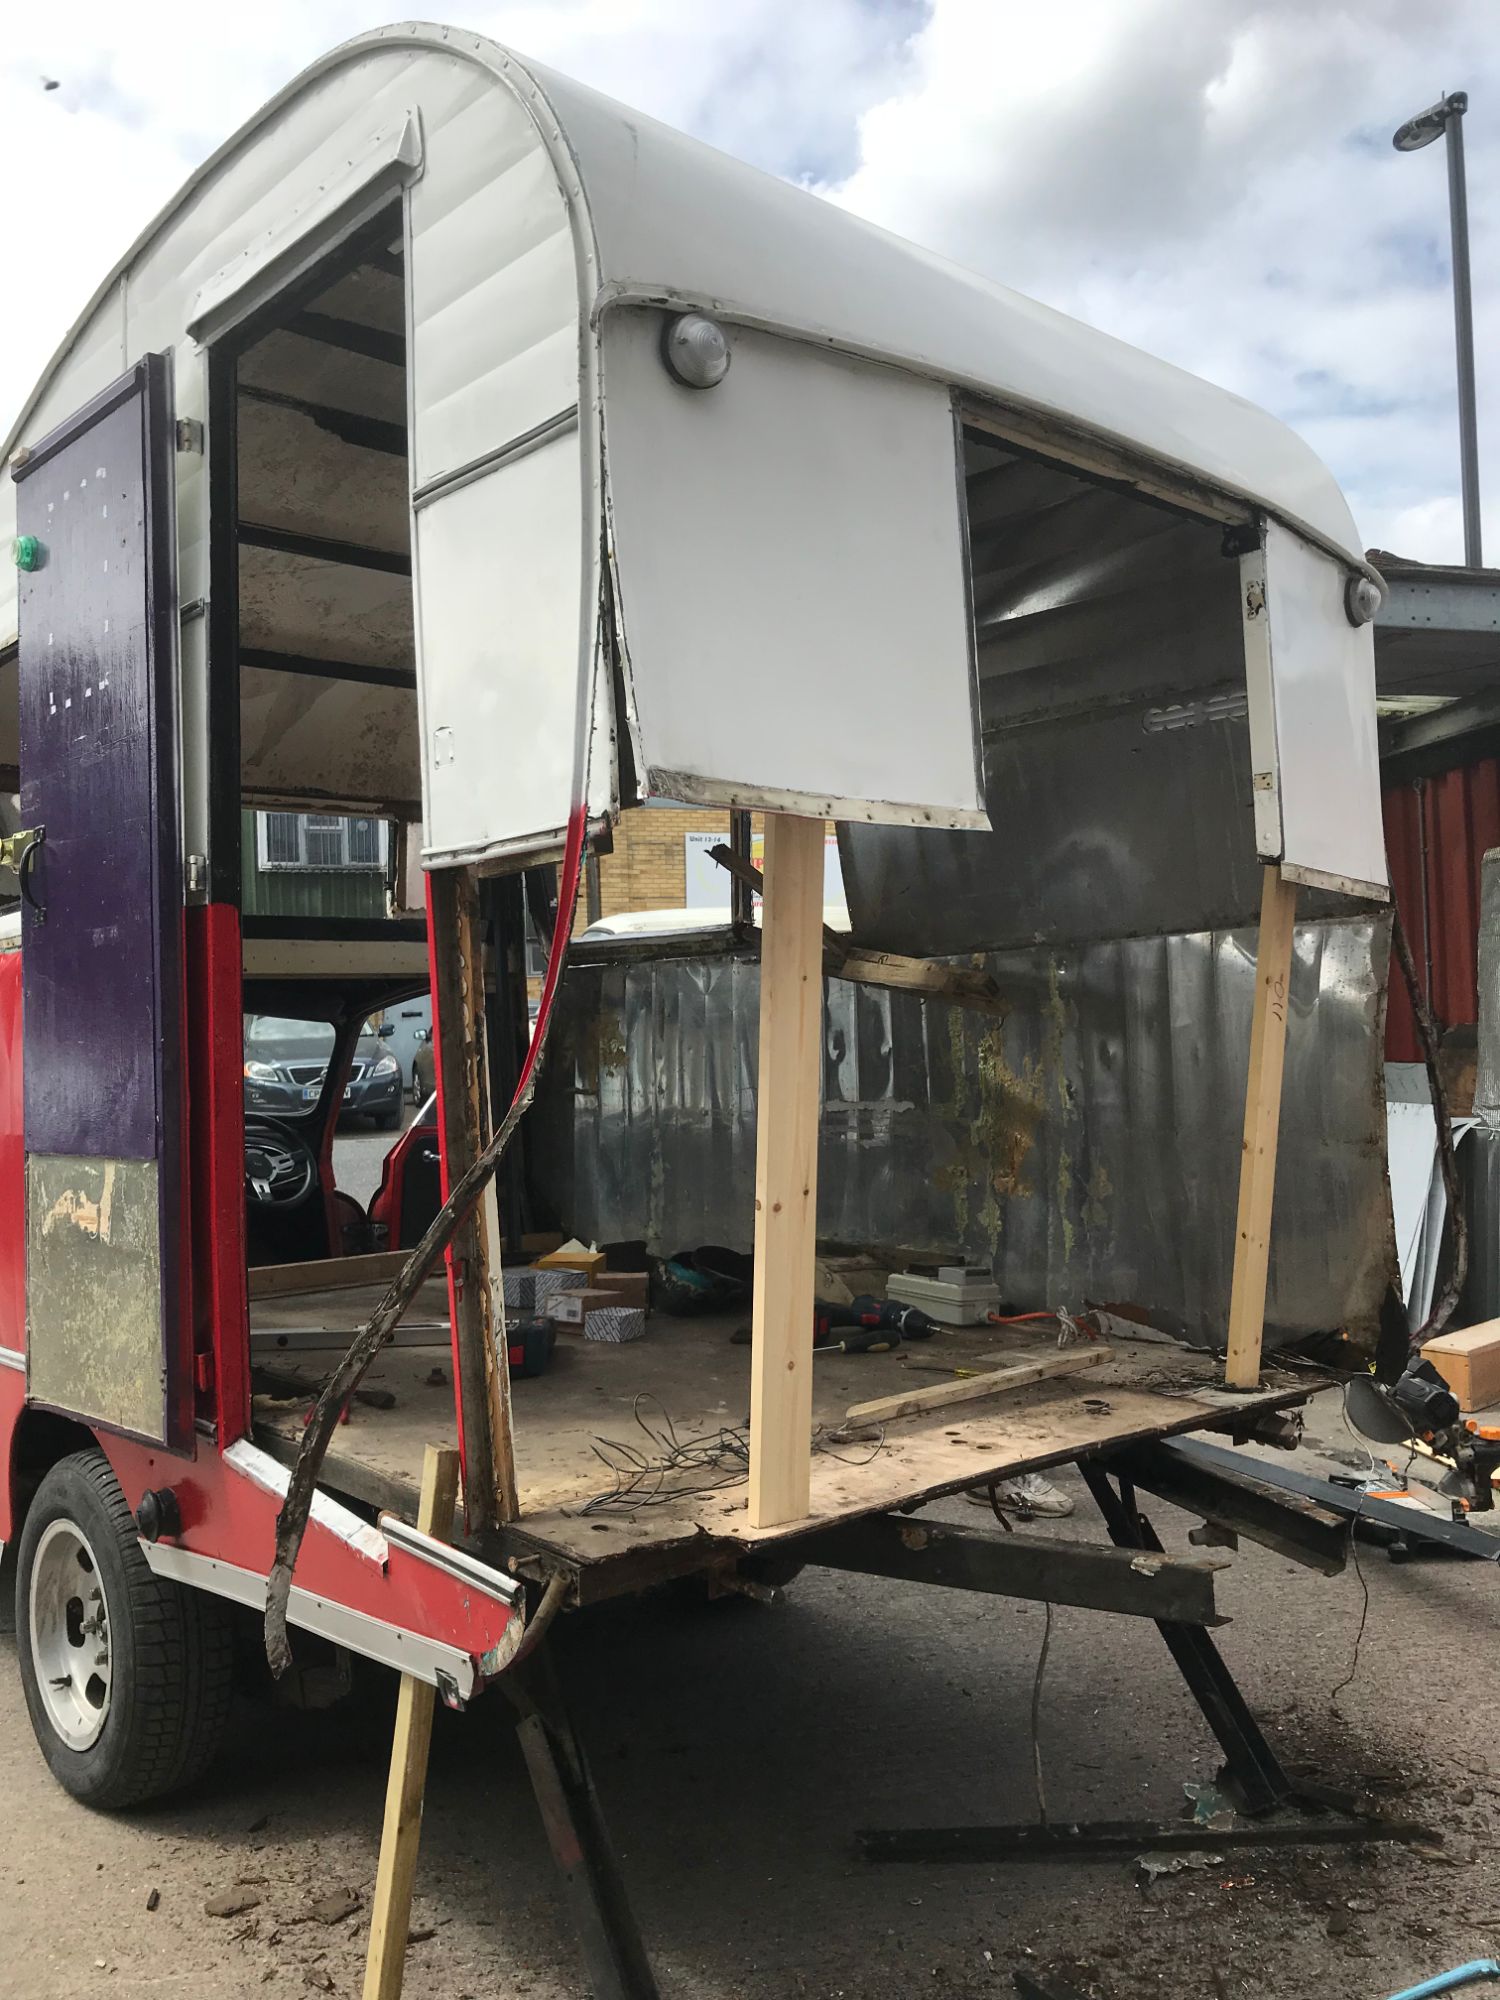
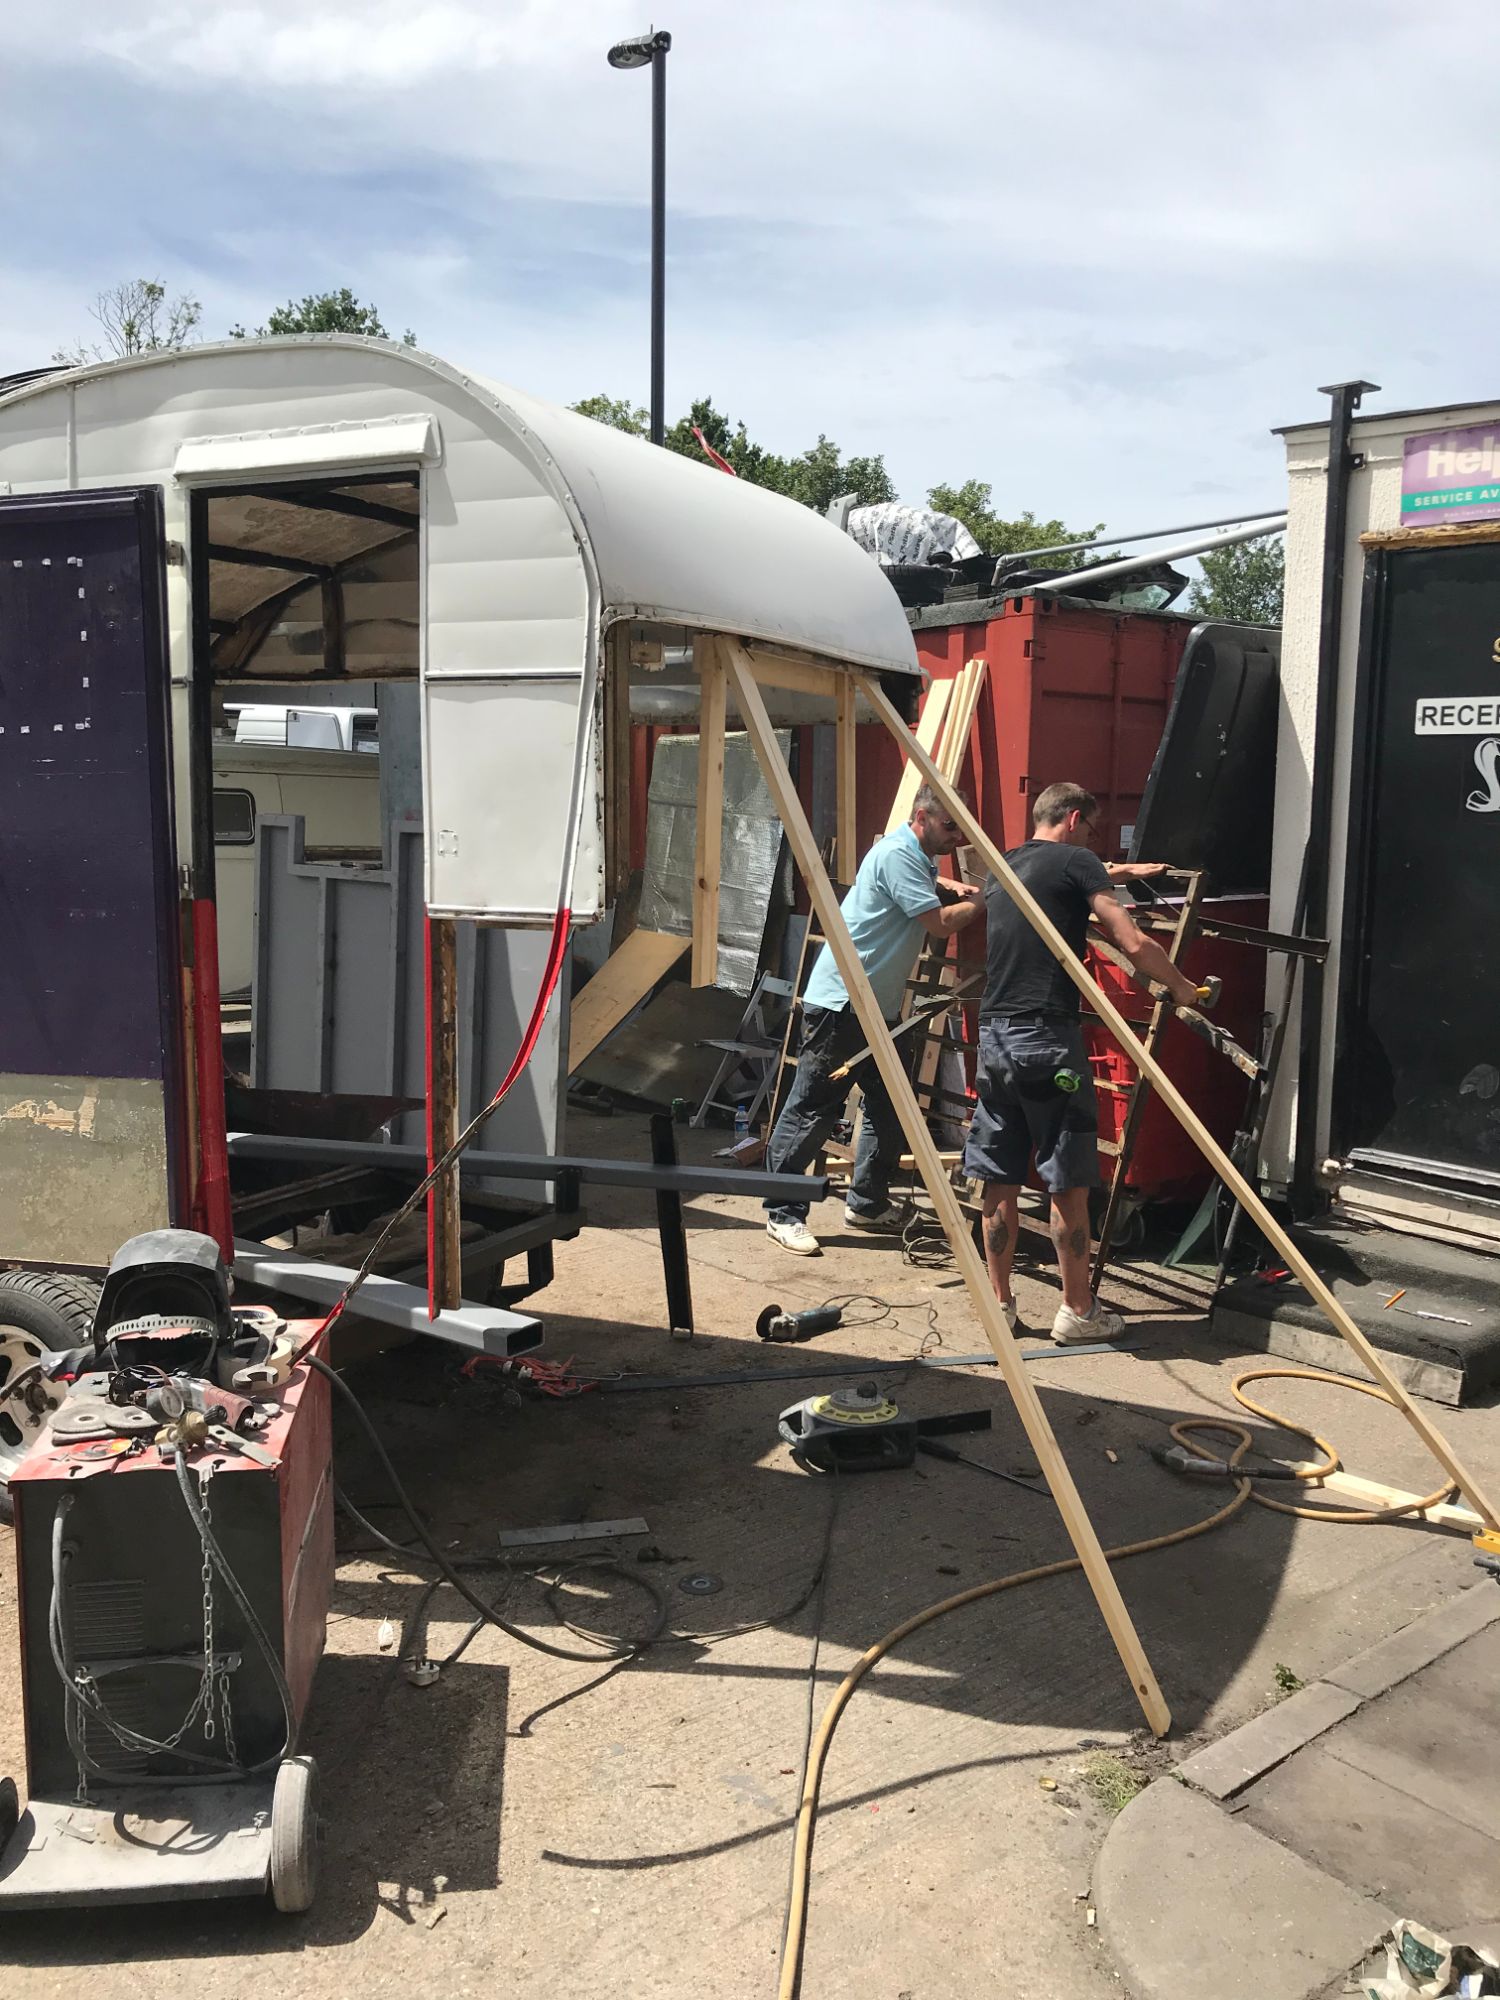
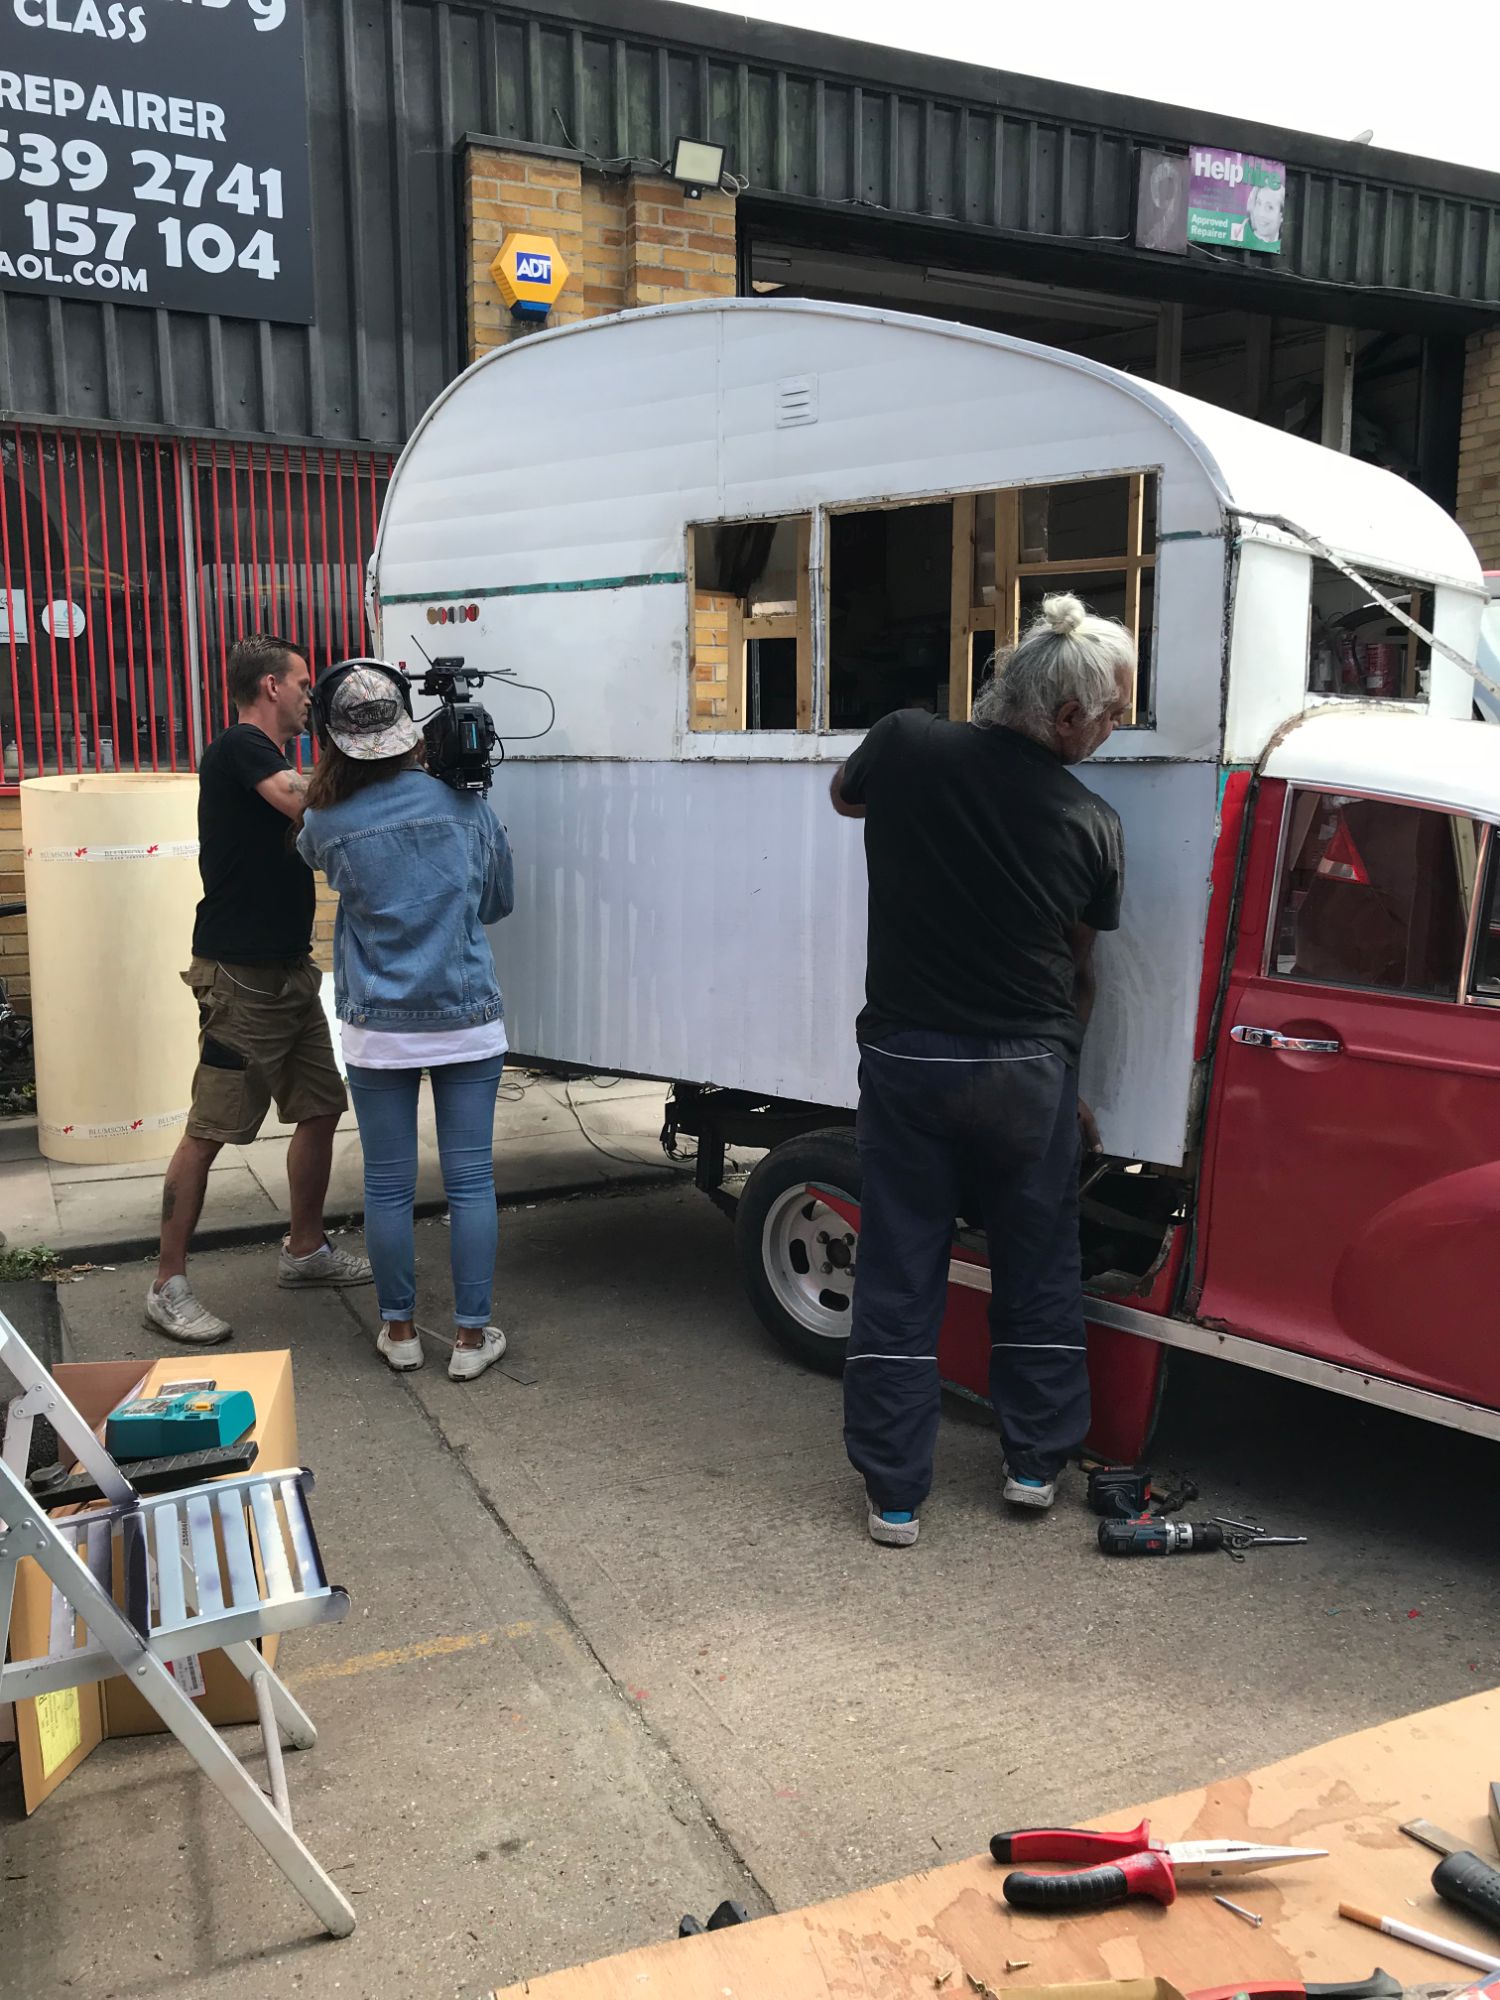
Removing the wood framework inside the rear had unavoidably damaged beyond repair the aluminium panels under the windows either side and at the rear, so these were removed. I wanted to keep the original gutter rails, and as they were a soft metal I could just carefully bend them out of the way. And a makeshift wood frame was fixed to the rear, which did a great job of stopping the roof from falling in!
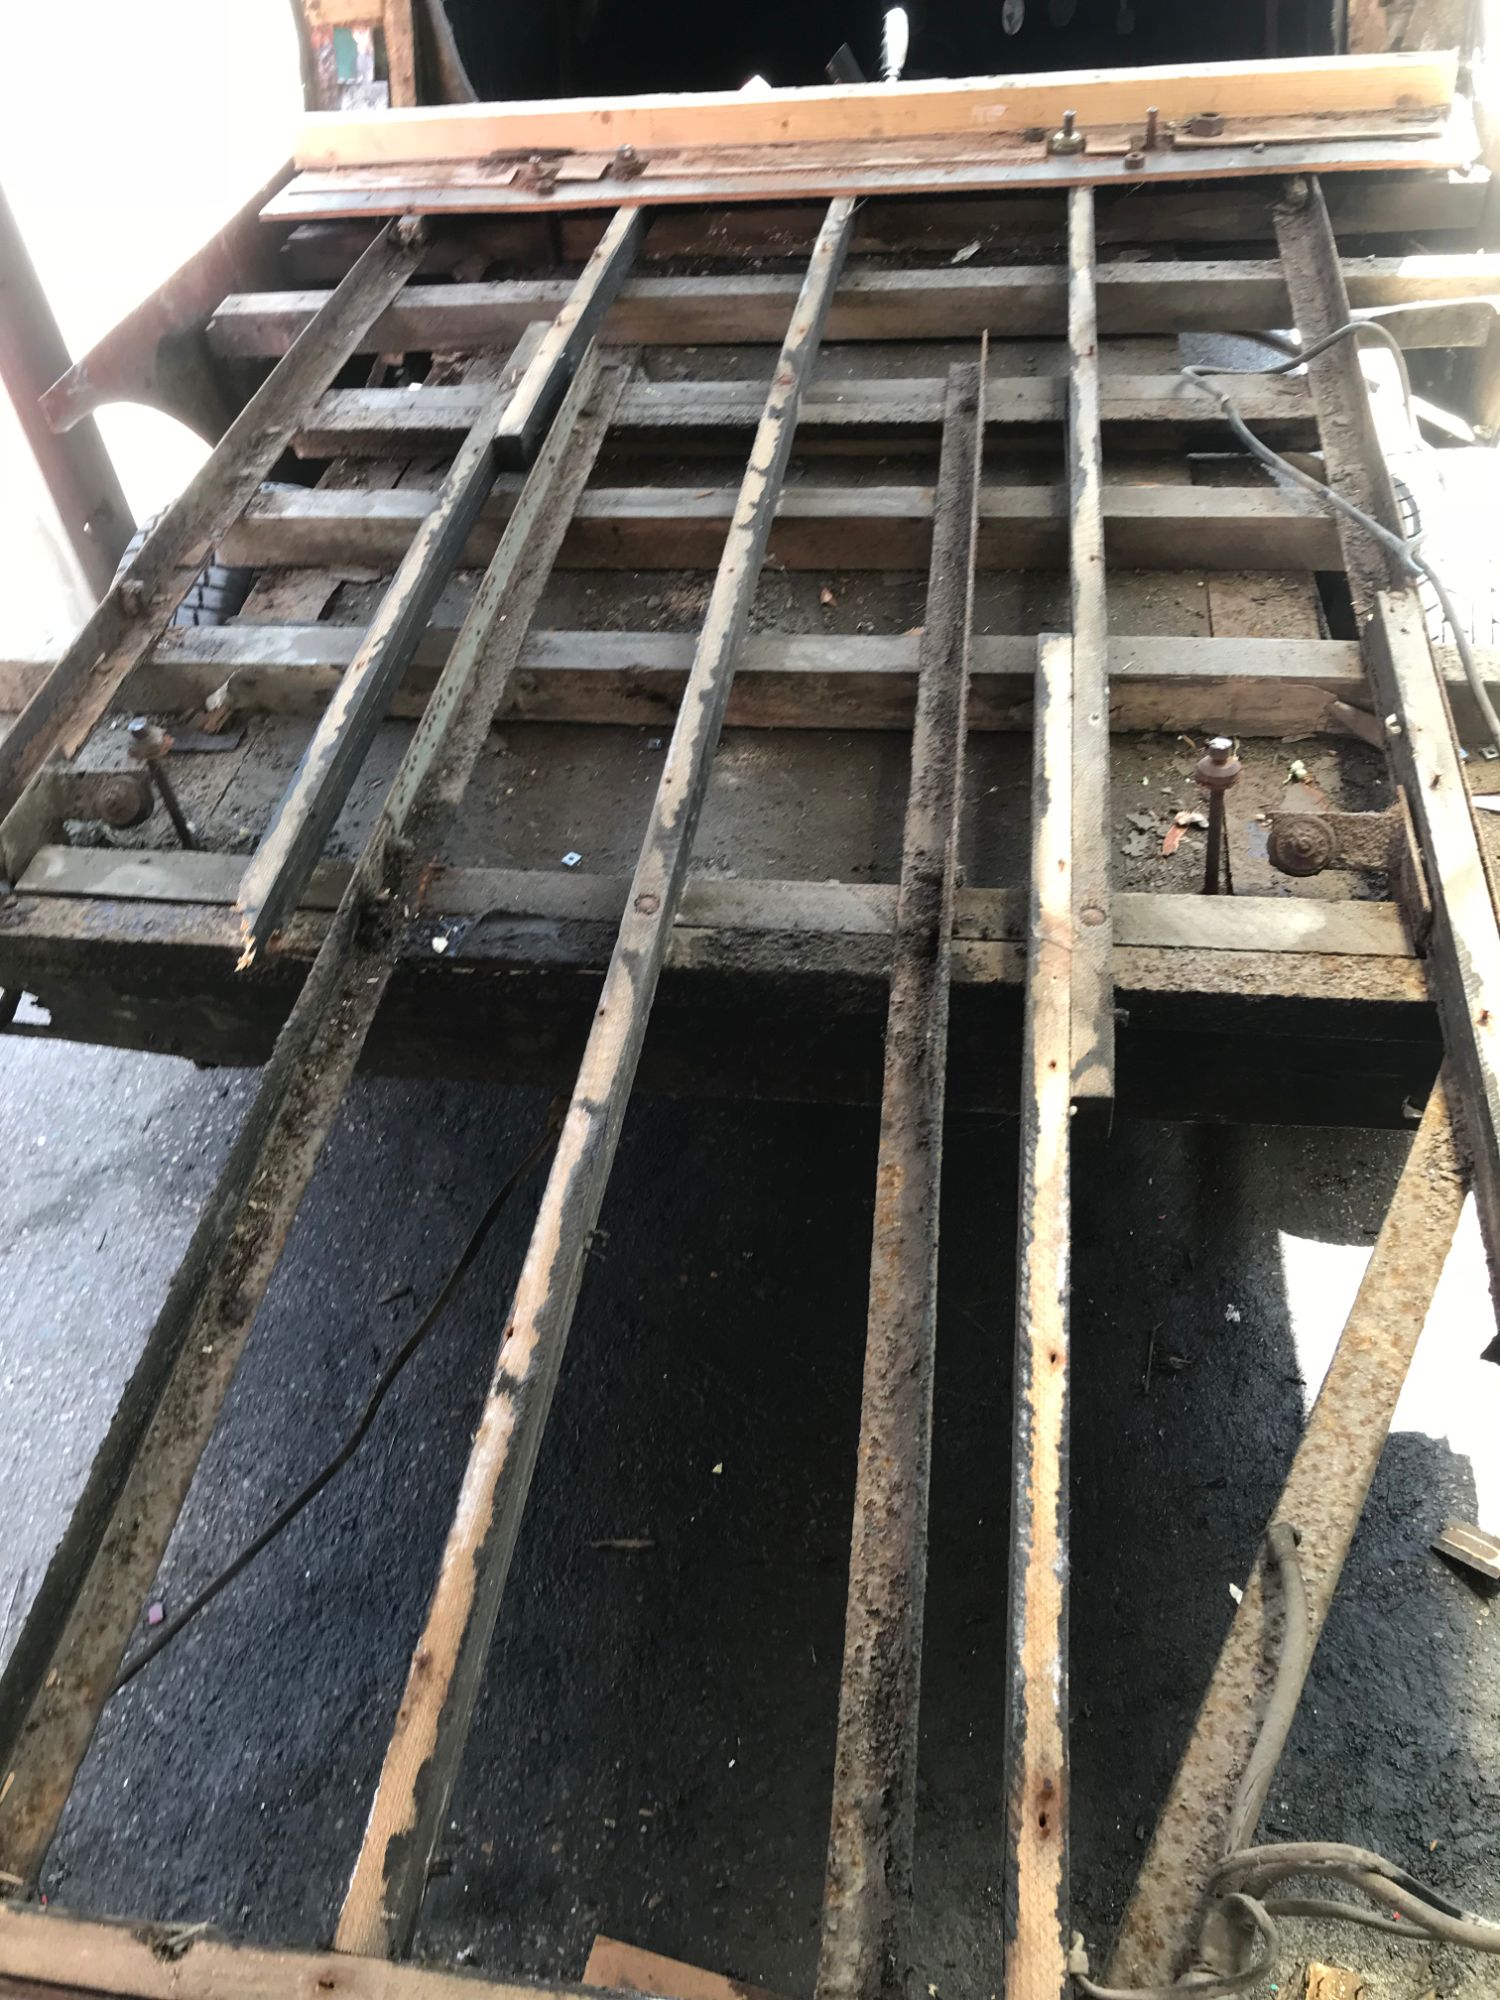
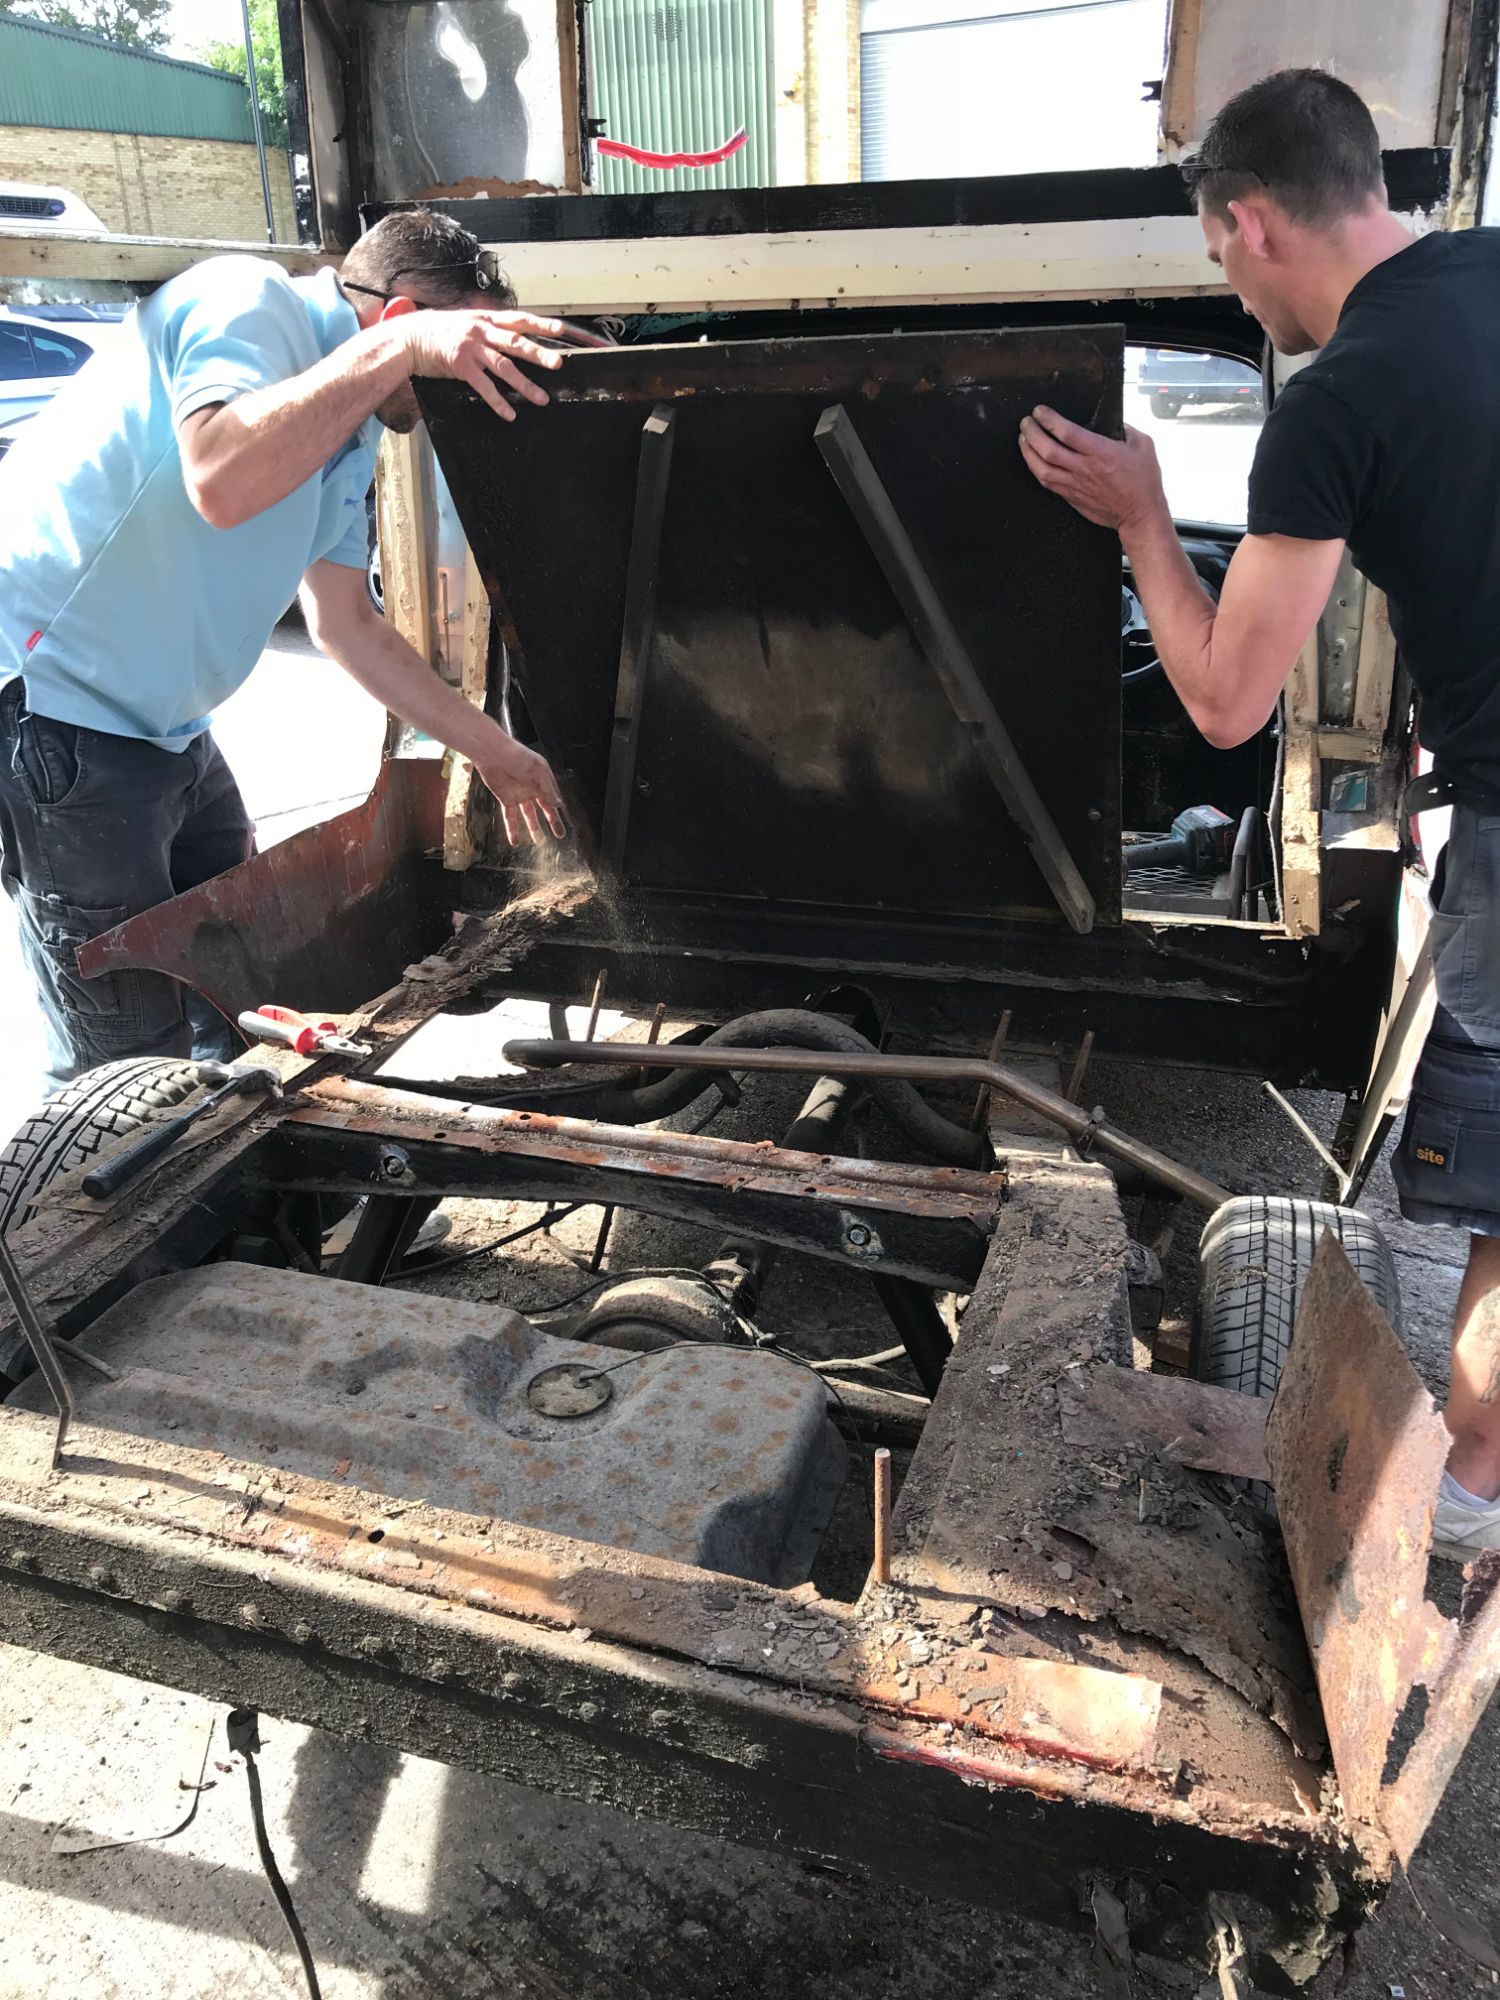
THE EYE OF THE STORM - RUST AND MORE RUST!
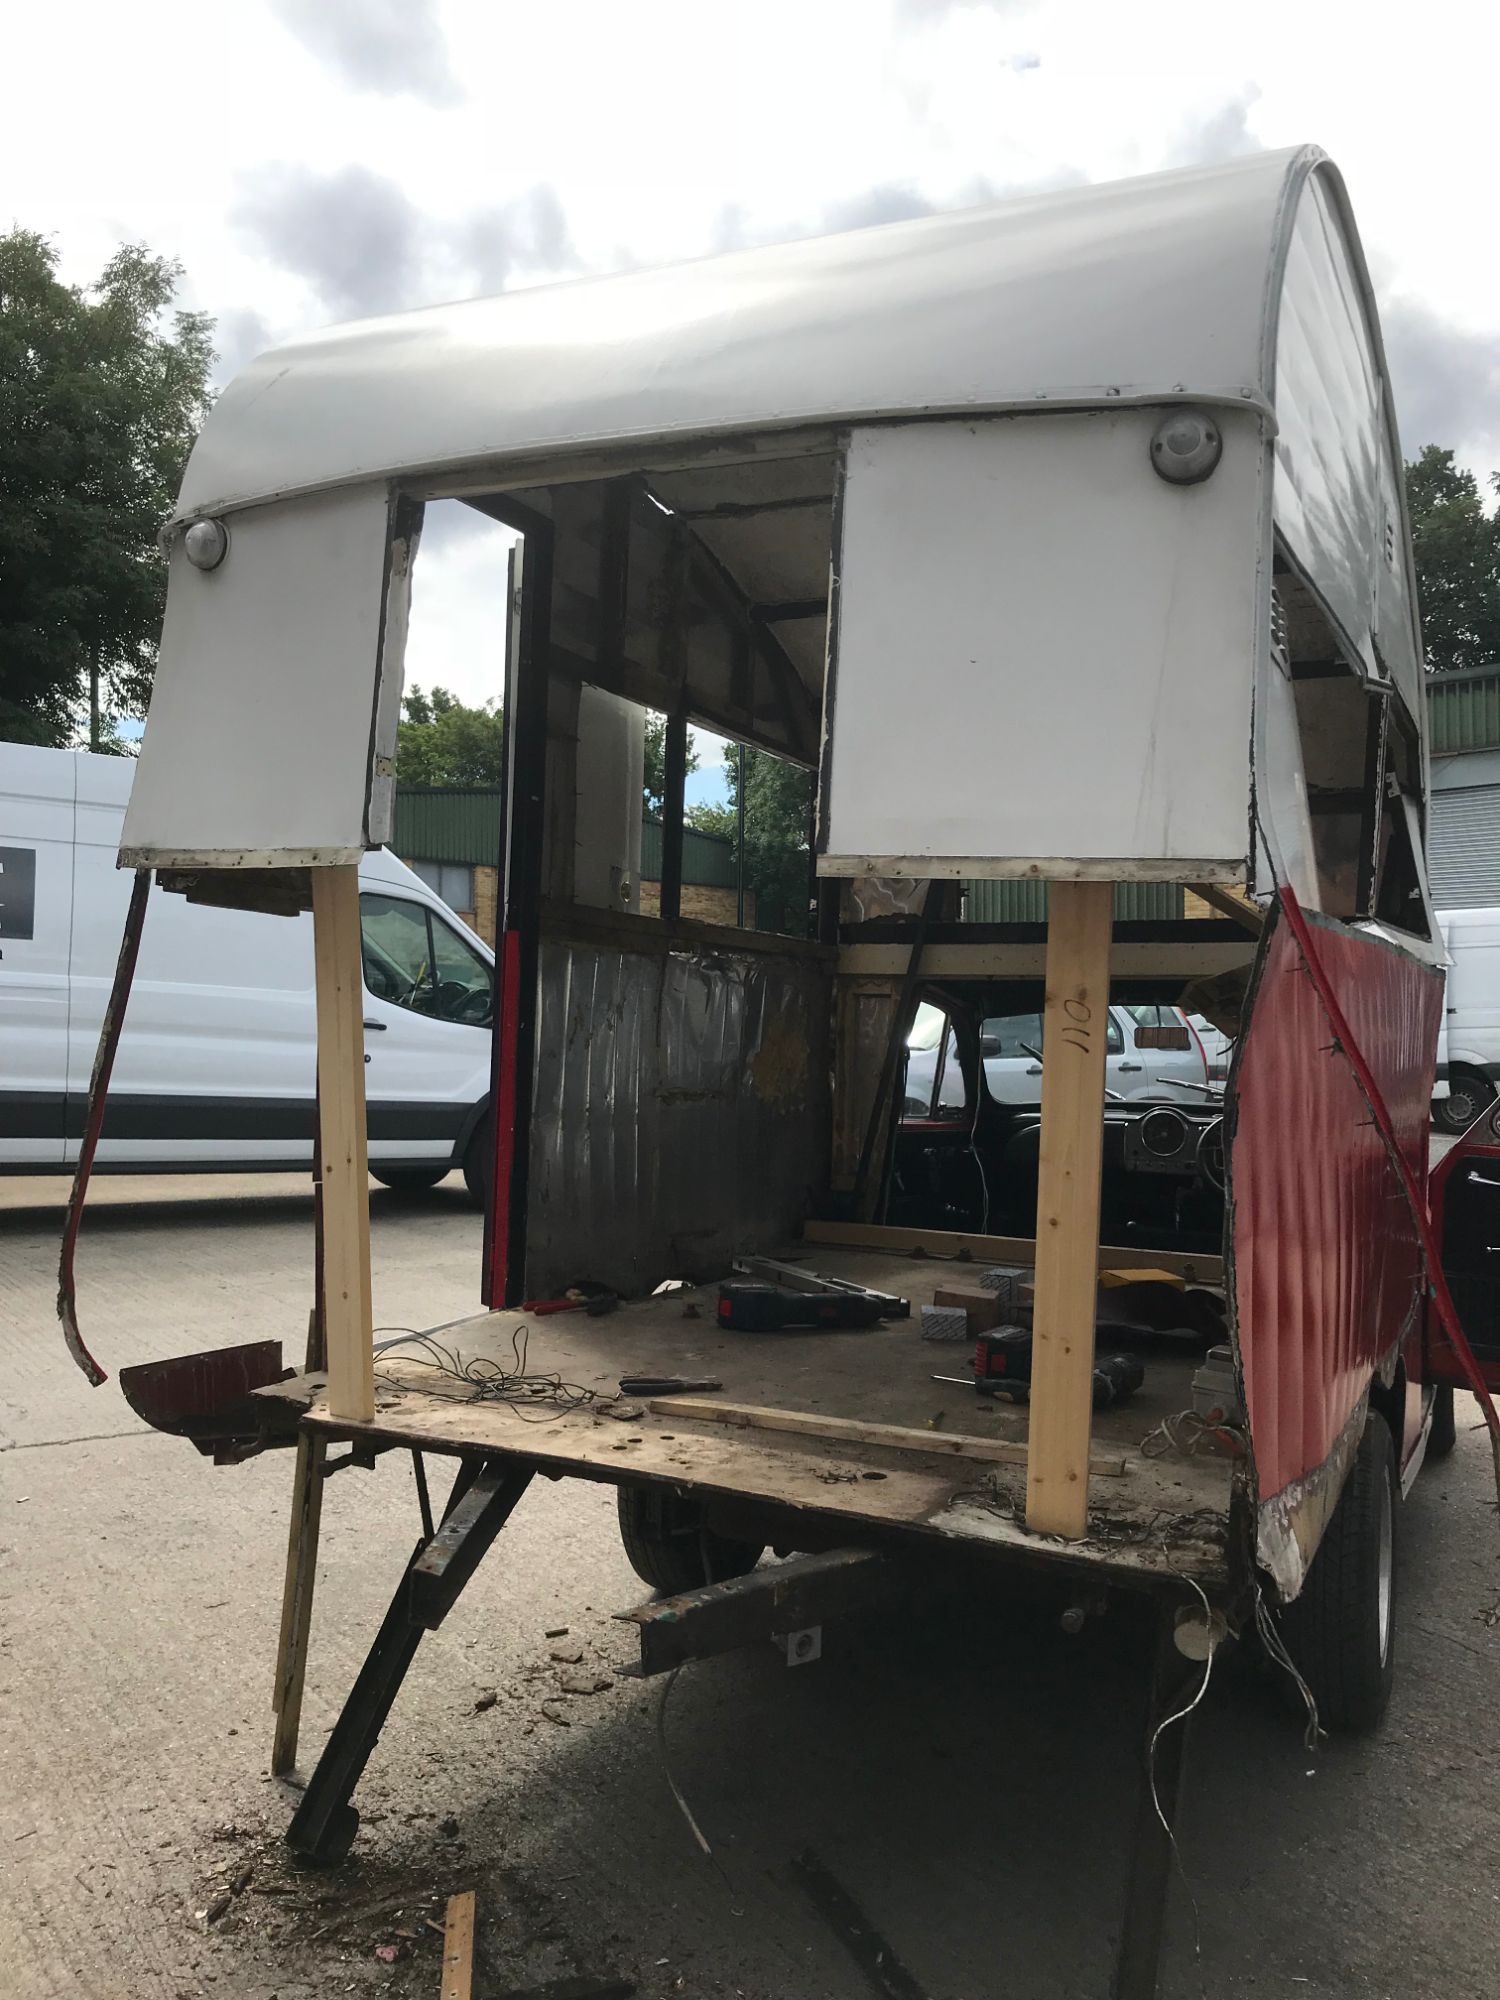
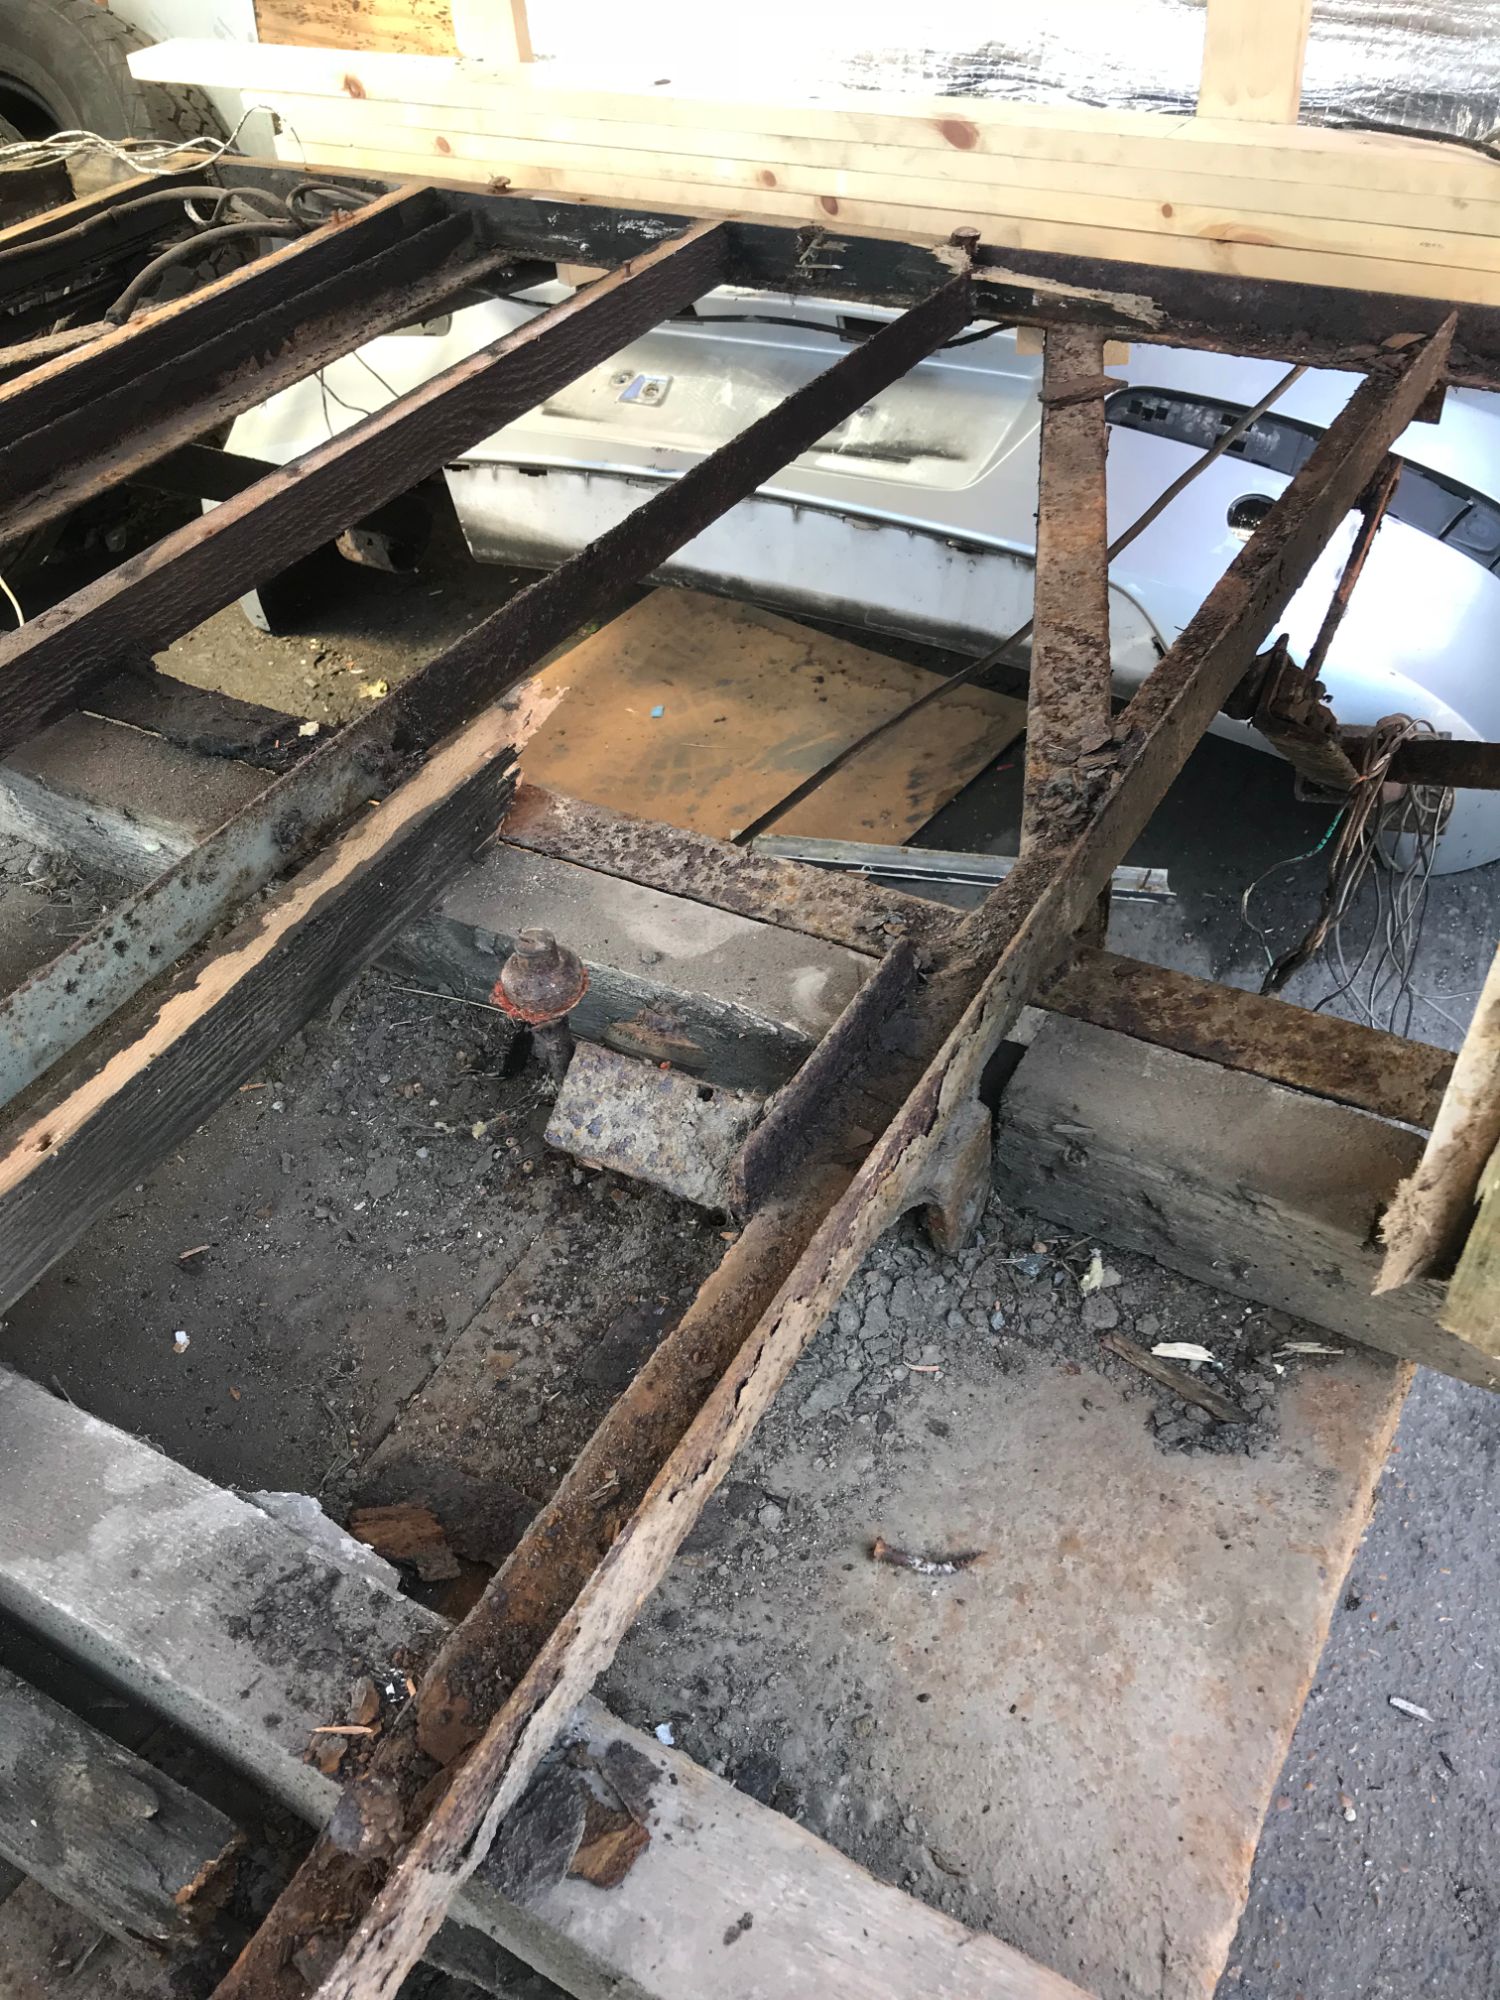
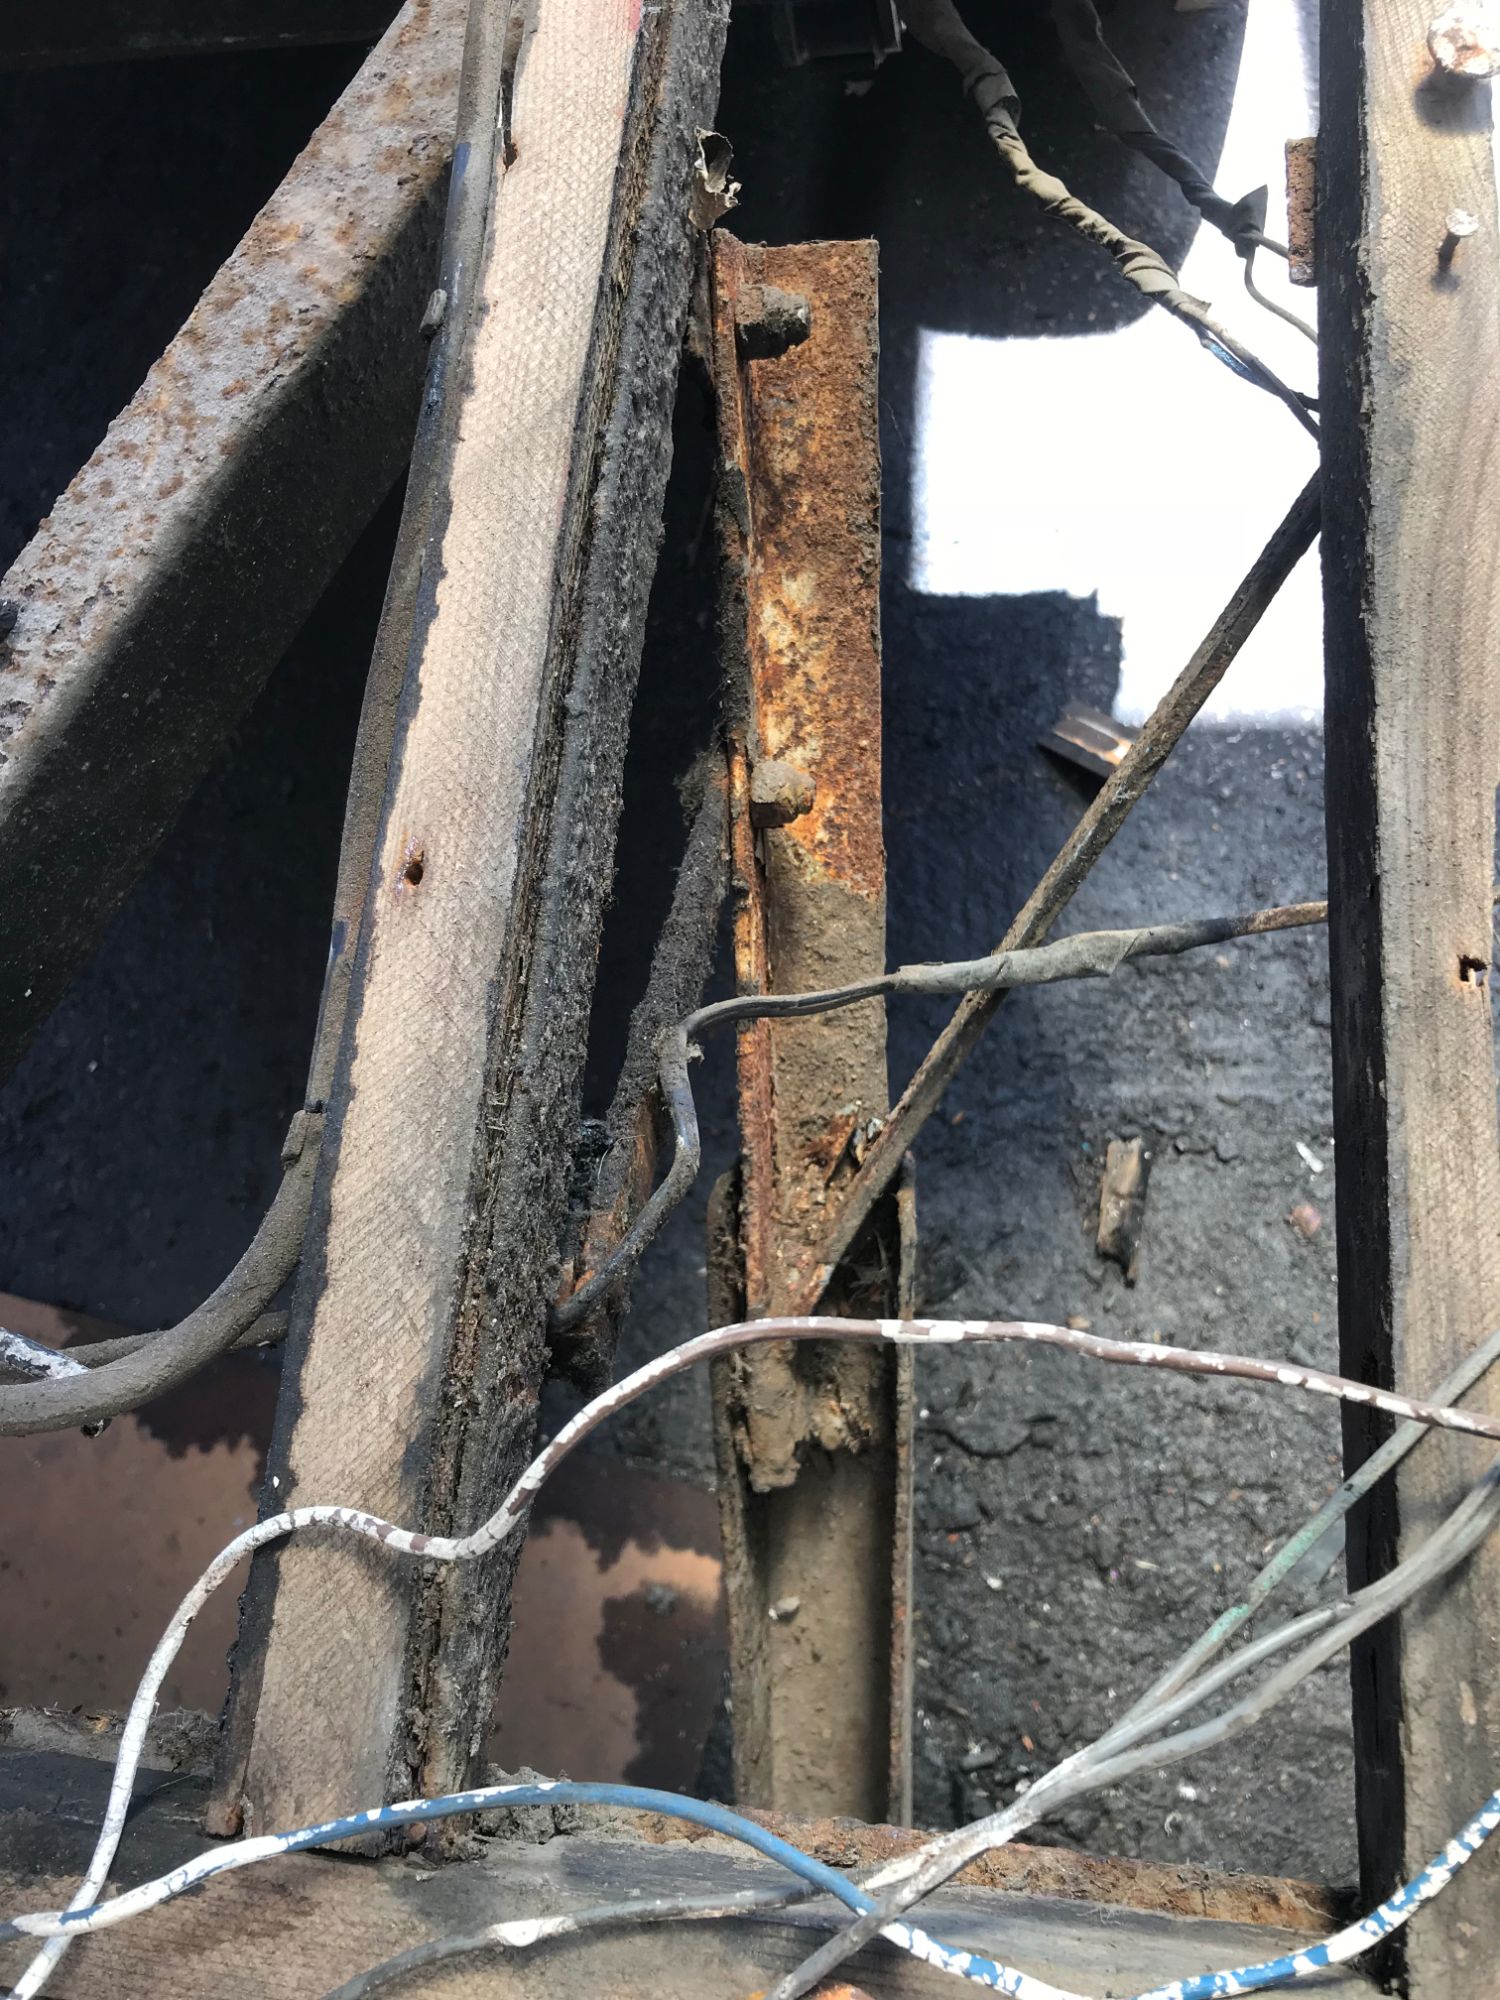
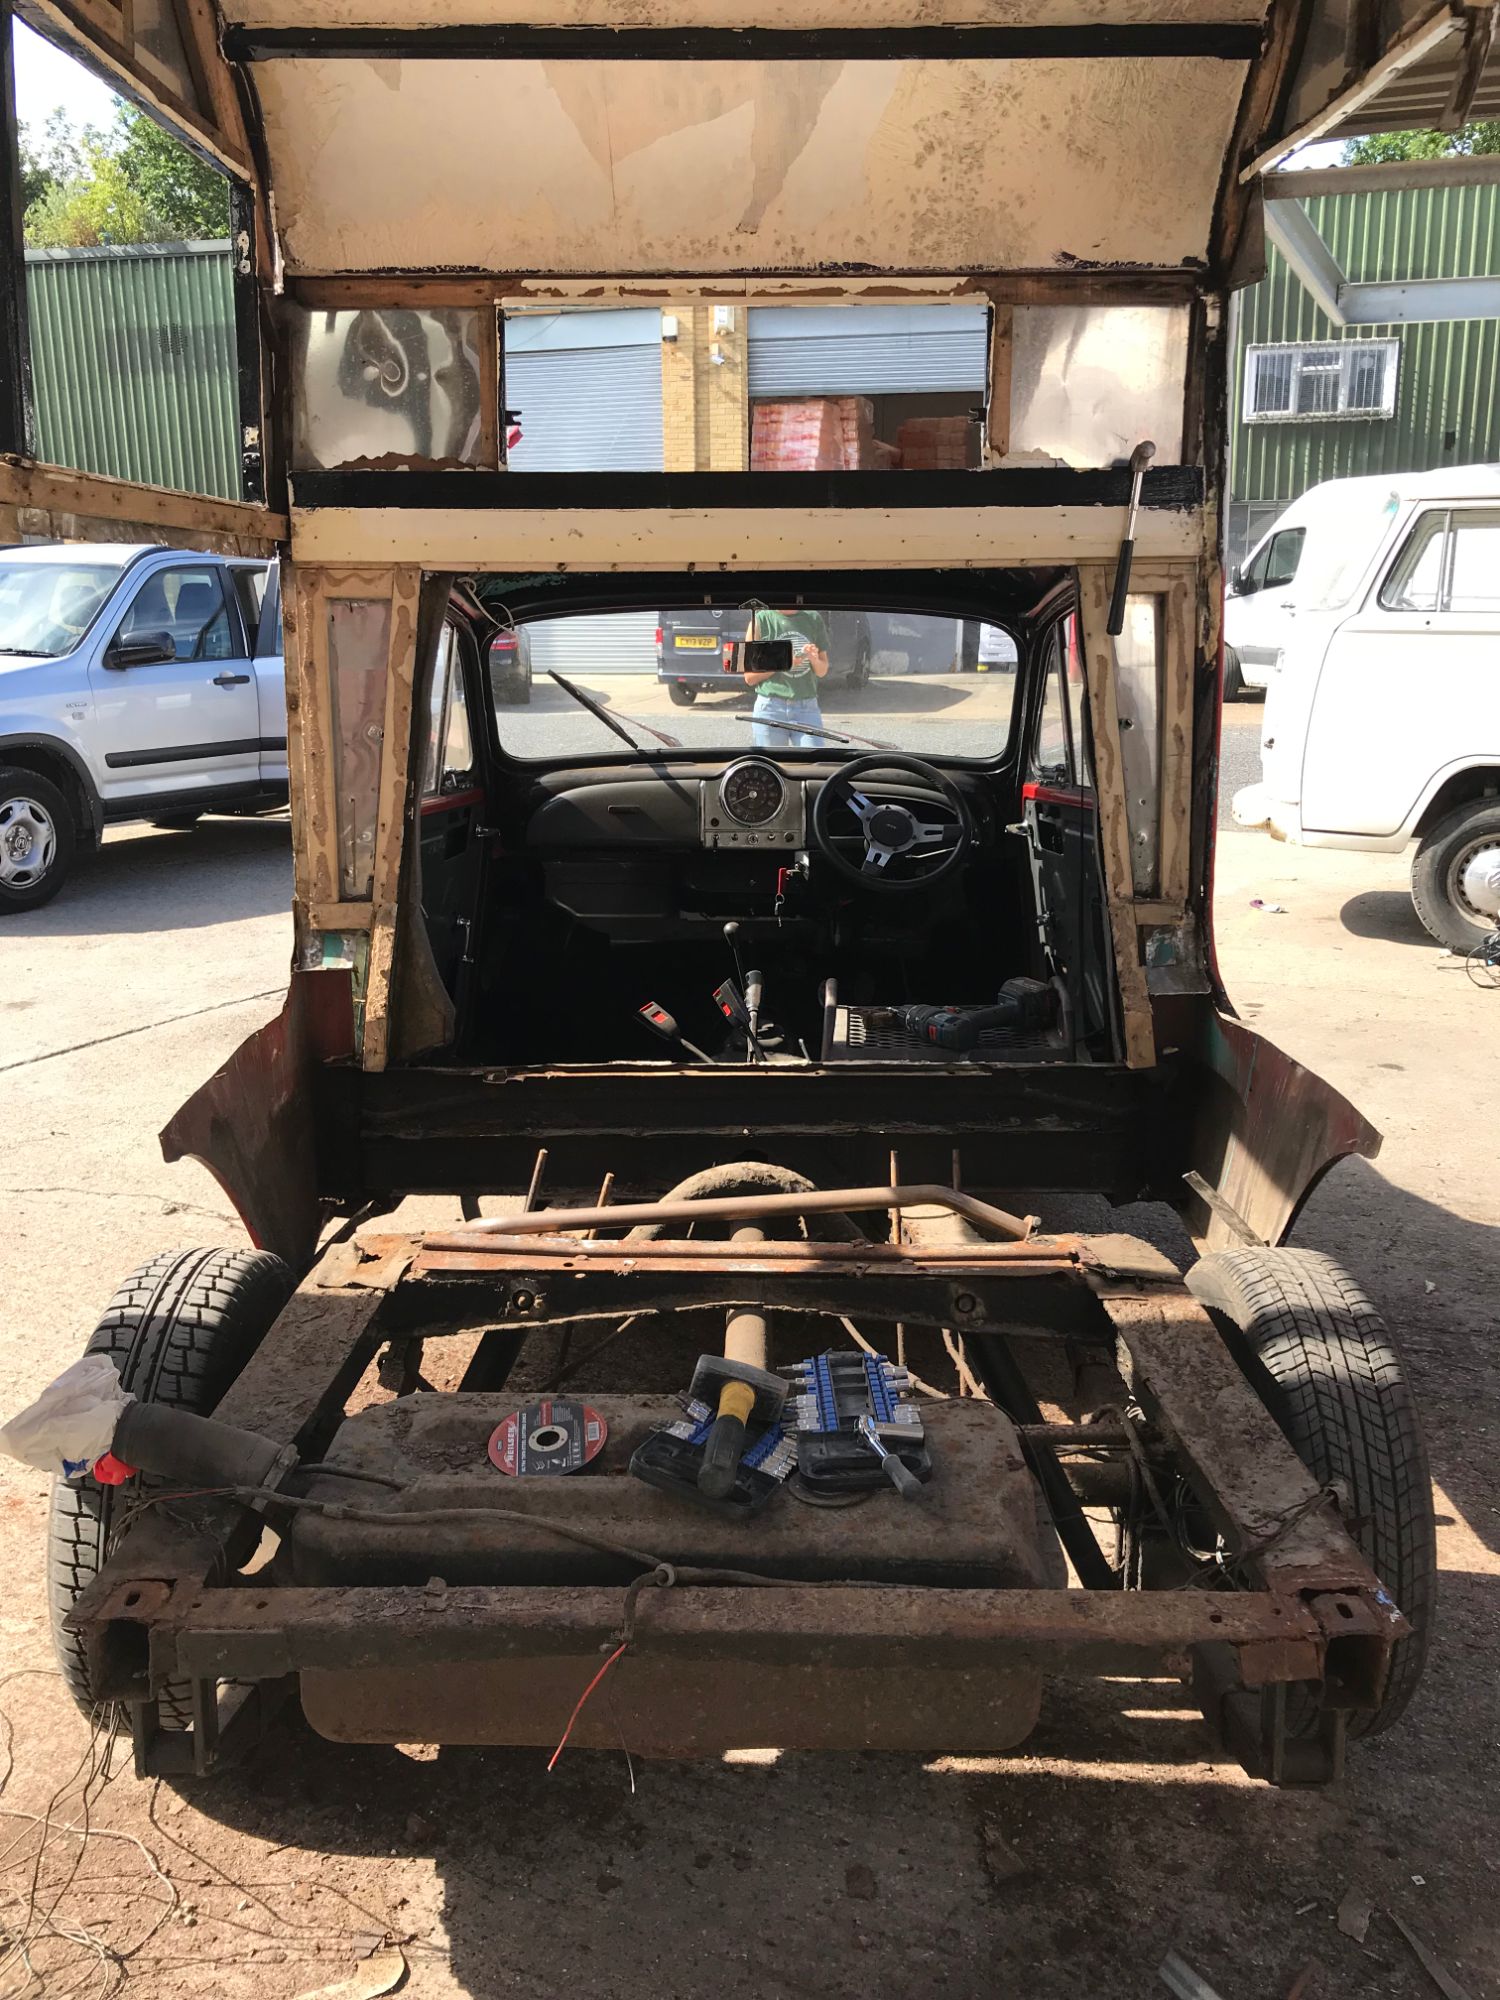
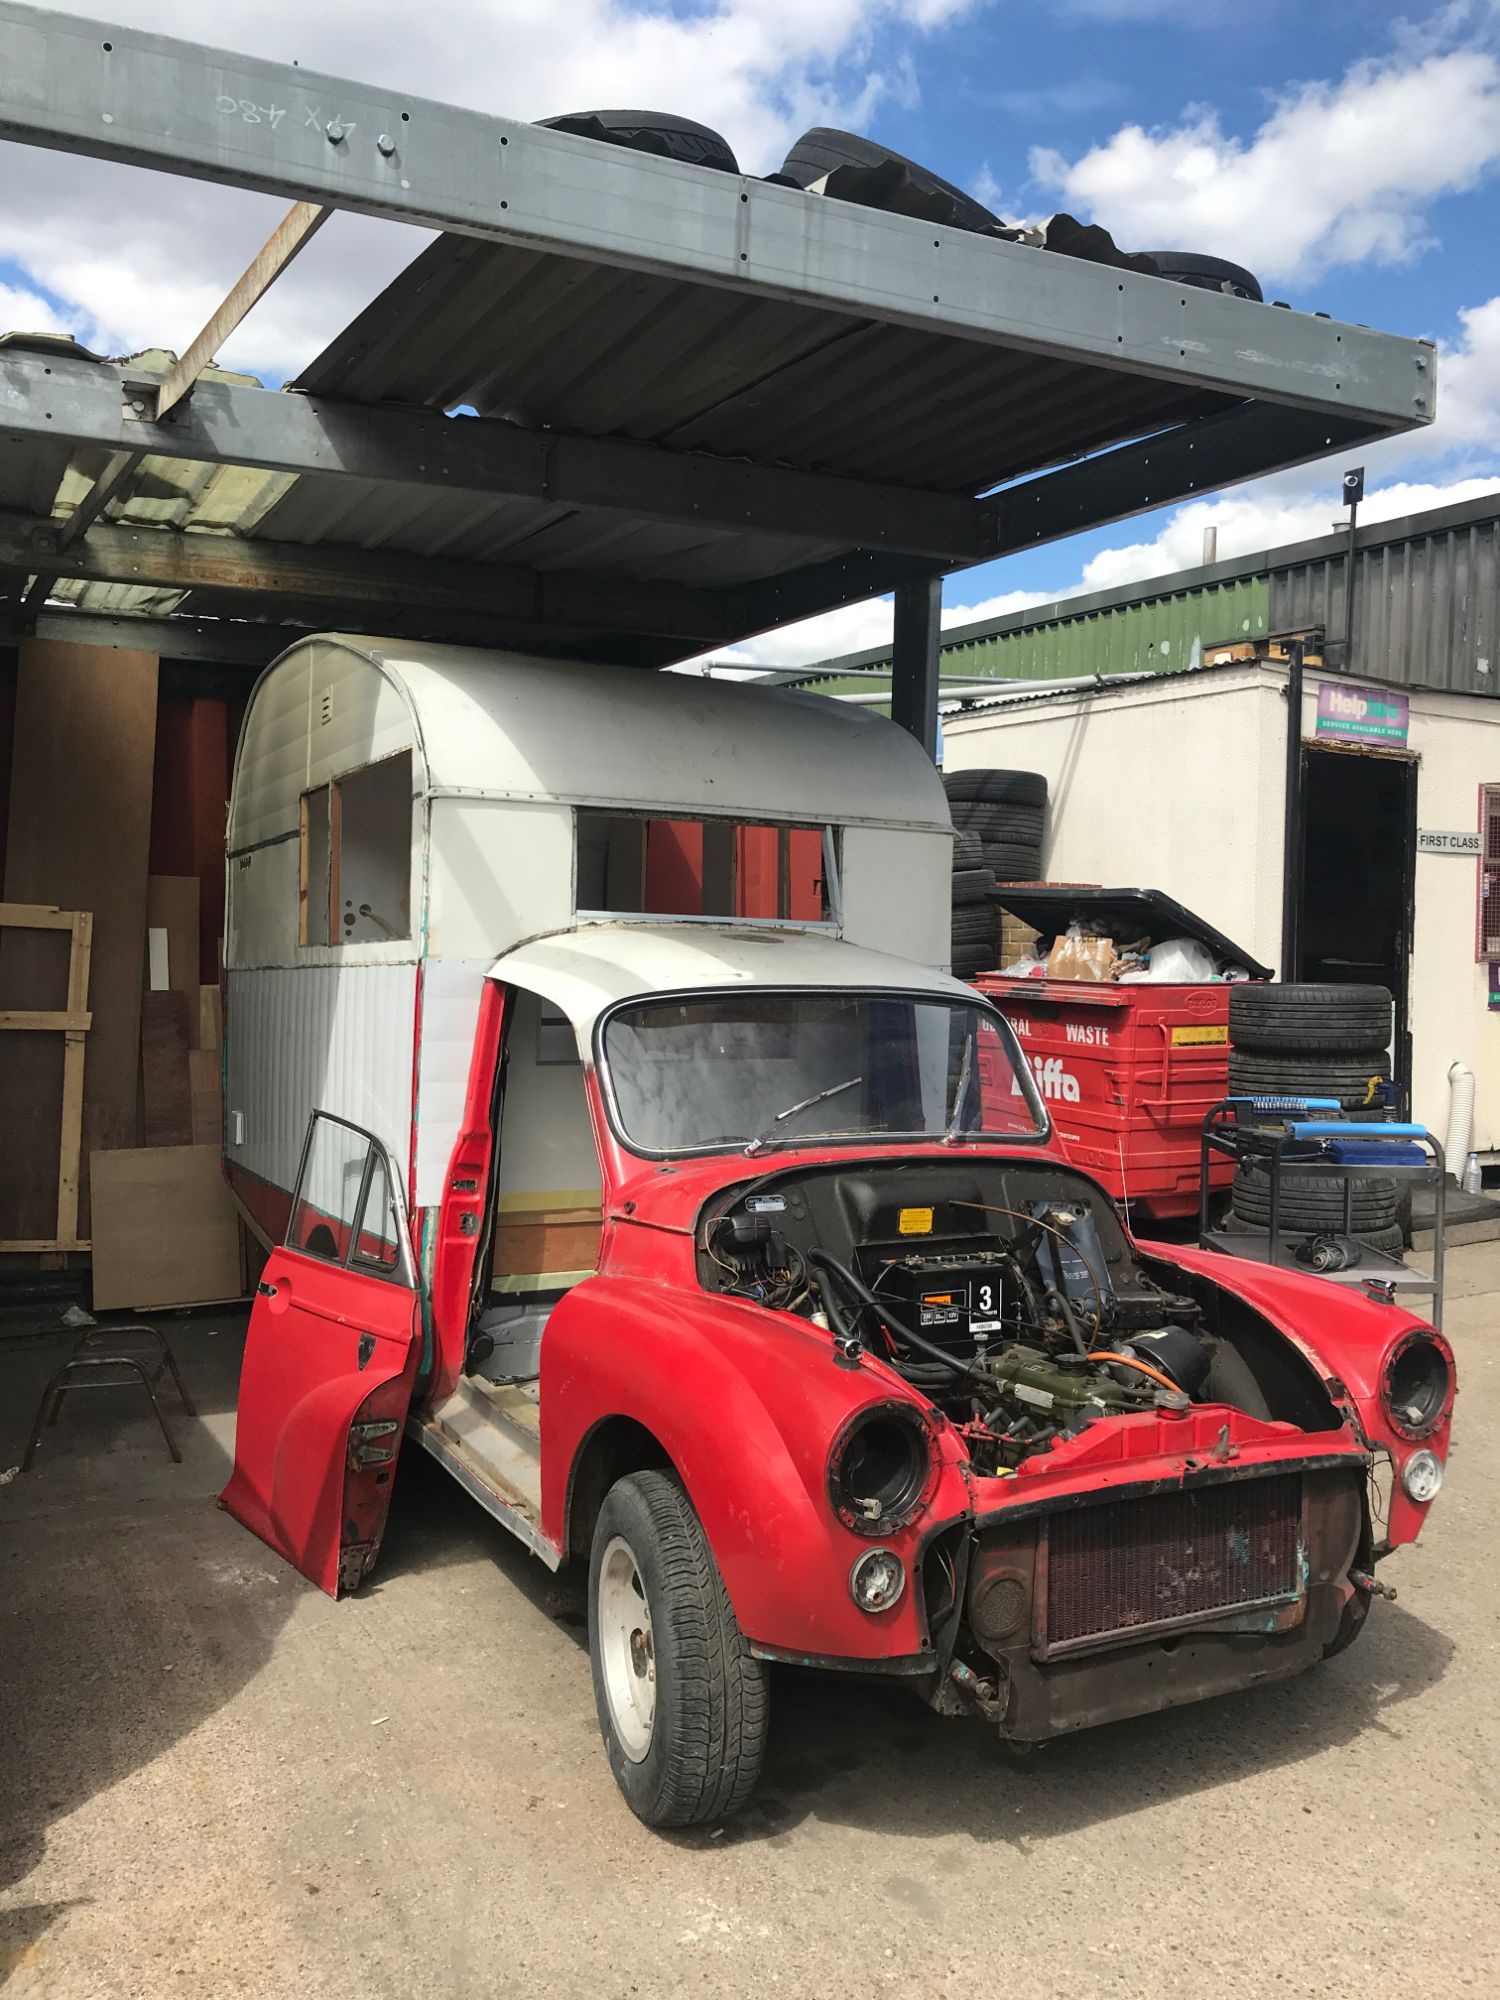
Angle iron uprights were fitted at the corner joins of the front cab and rear, and horizontally across the rear of the floor at the back, but Billy was still refusing to lift and level out. Though the old wood floor appeared to be in pretty good shape, there was no choice but to take that up to find out what was going on underneath, And the reality was the floor was disguising that the entire sub-frame needed replacing. The old frame was almost completely rusted through and was bent downwards at the rear from years of use. If I didn't fix this, the restoration couldn't continue.
NEVER GIVING UP
Luckily, I love a challenge, and there was no way I was going to give up.
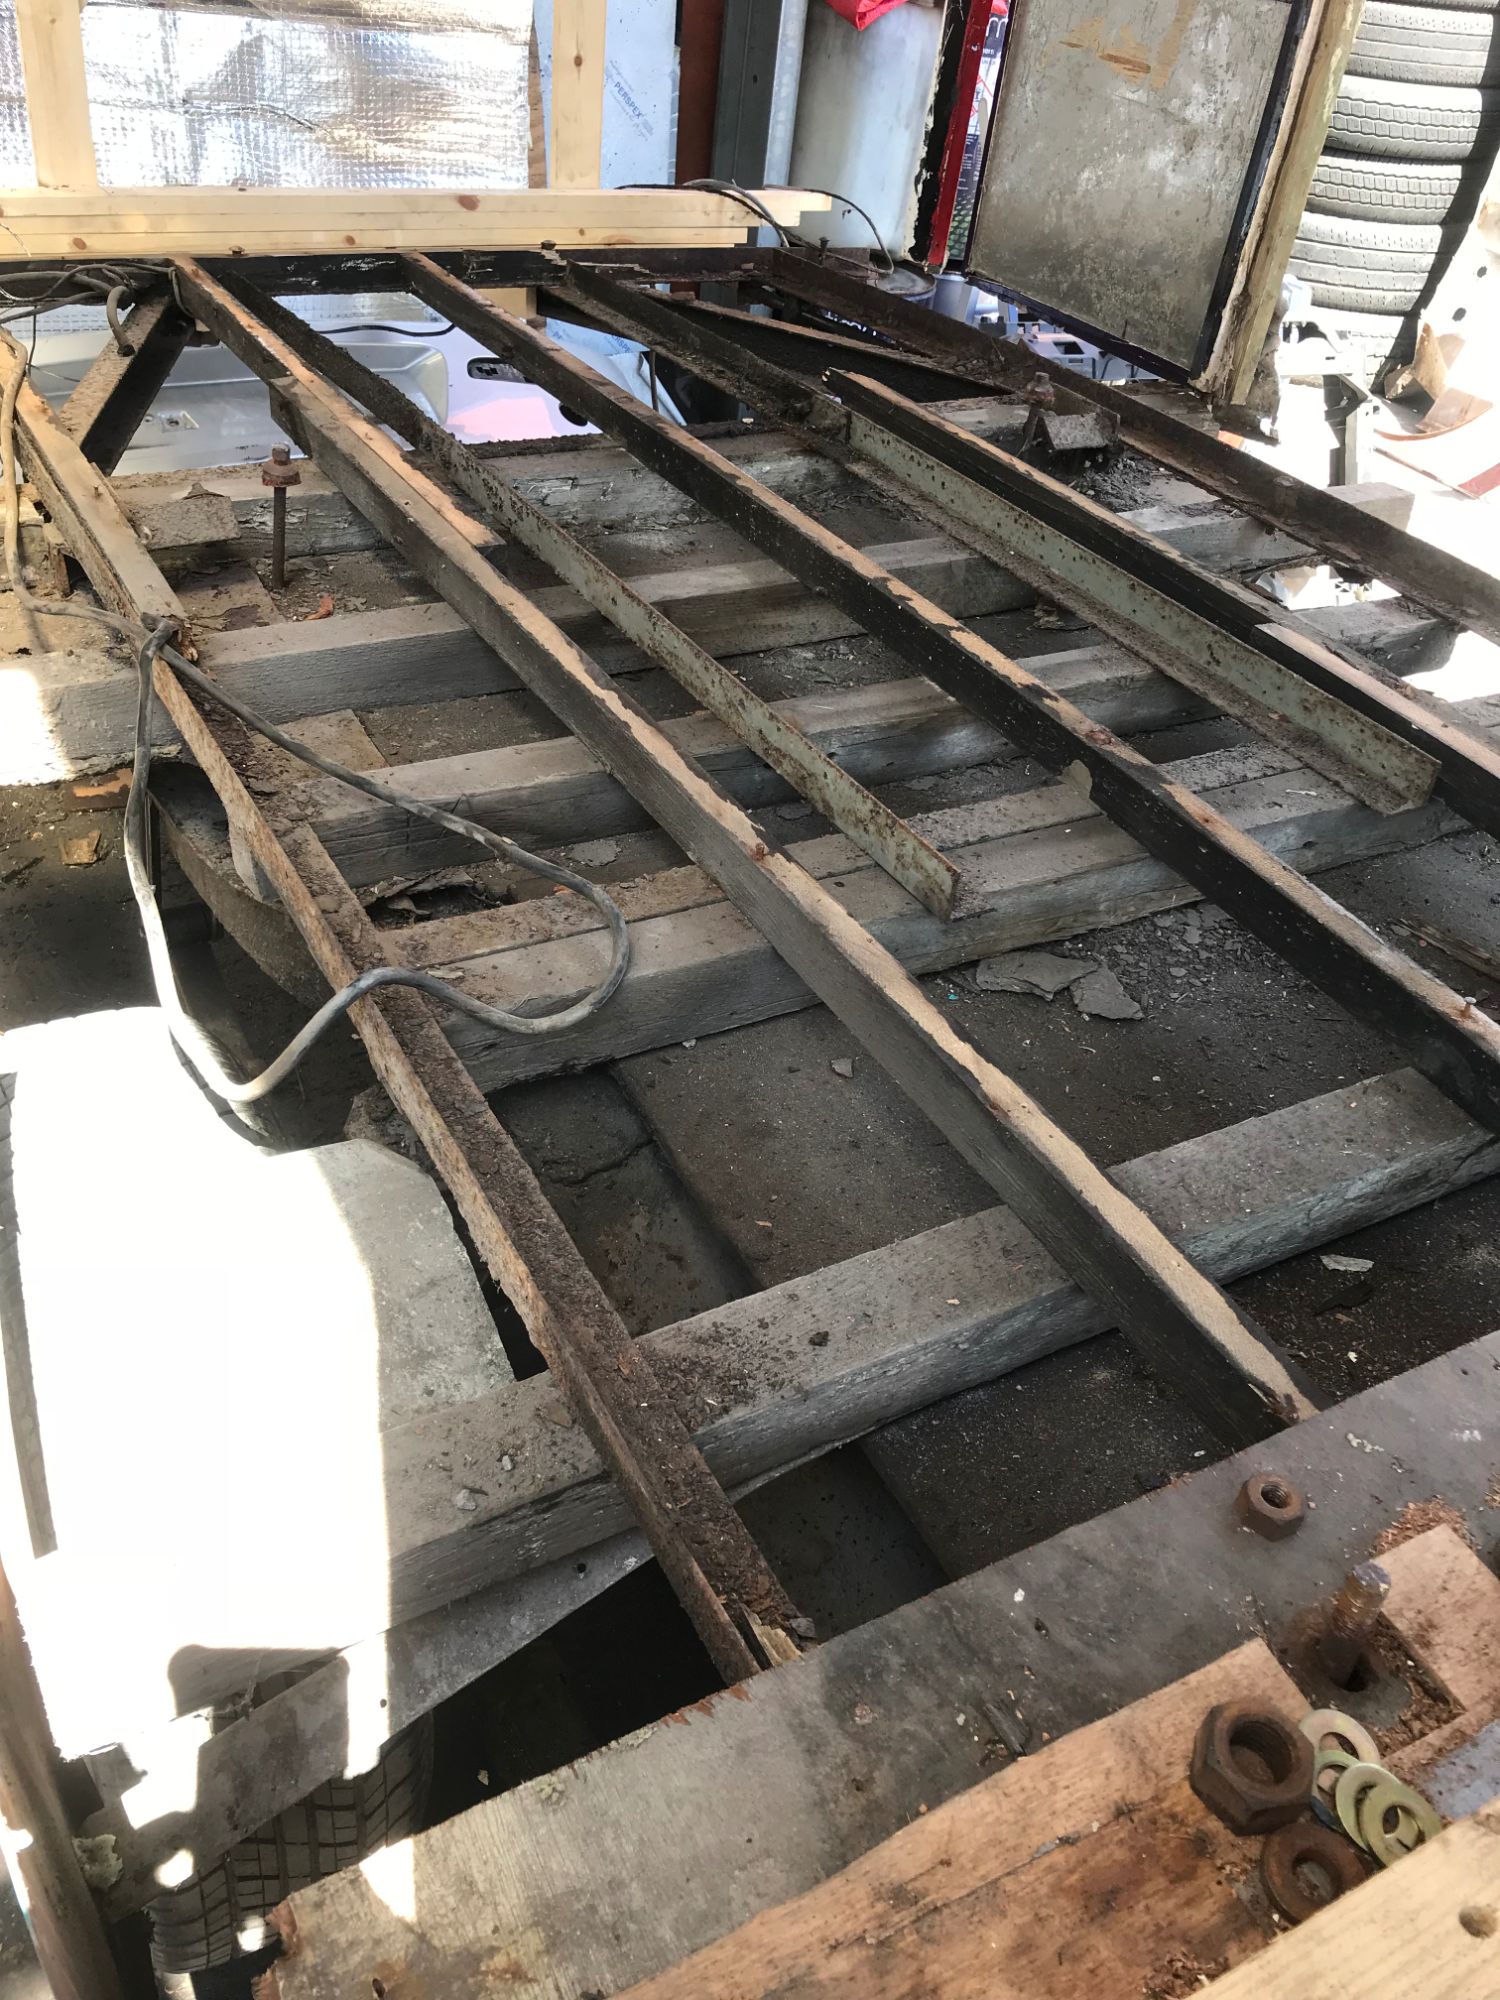
A chat with my local metal engineers saved the day, and we came up with a stronger and improved design for a new metal floor.
There was some positive though - the chassis was still good and needed just a bit of spot welding on the arches. So having done that job, I headed home for a much needed large glass of chilled white, and got to work on a revised plan for Project Billy!
MOVING FORWARD
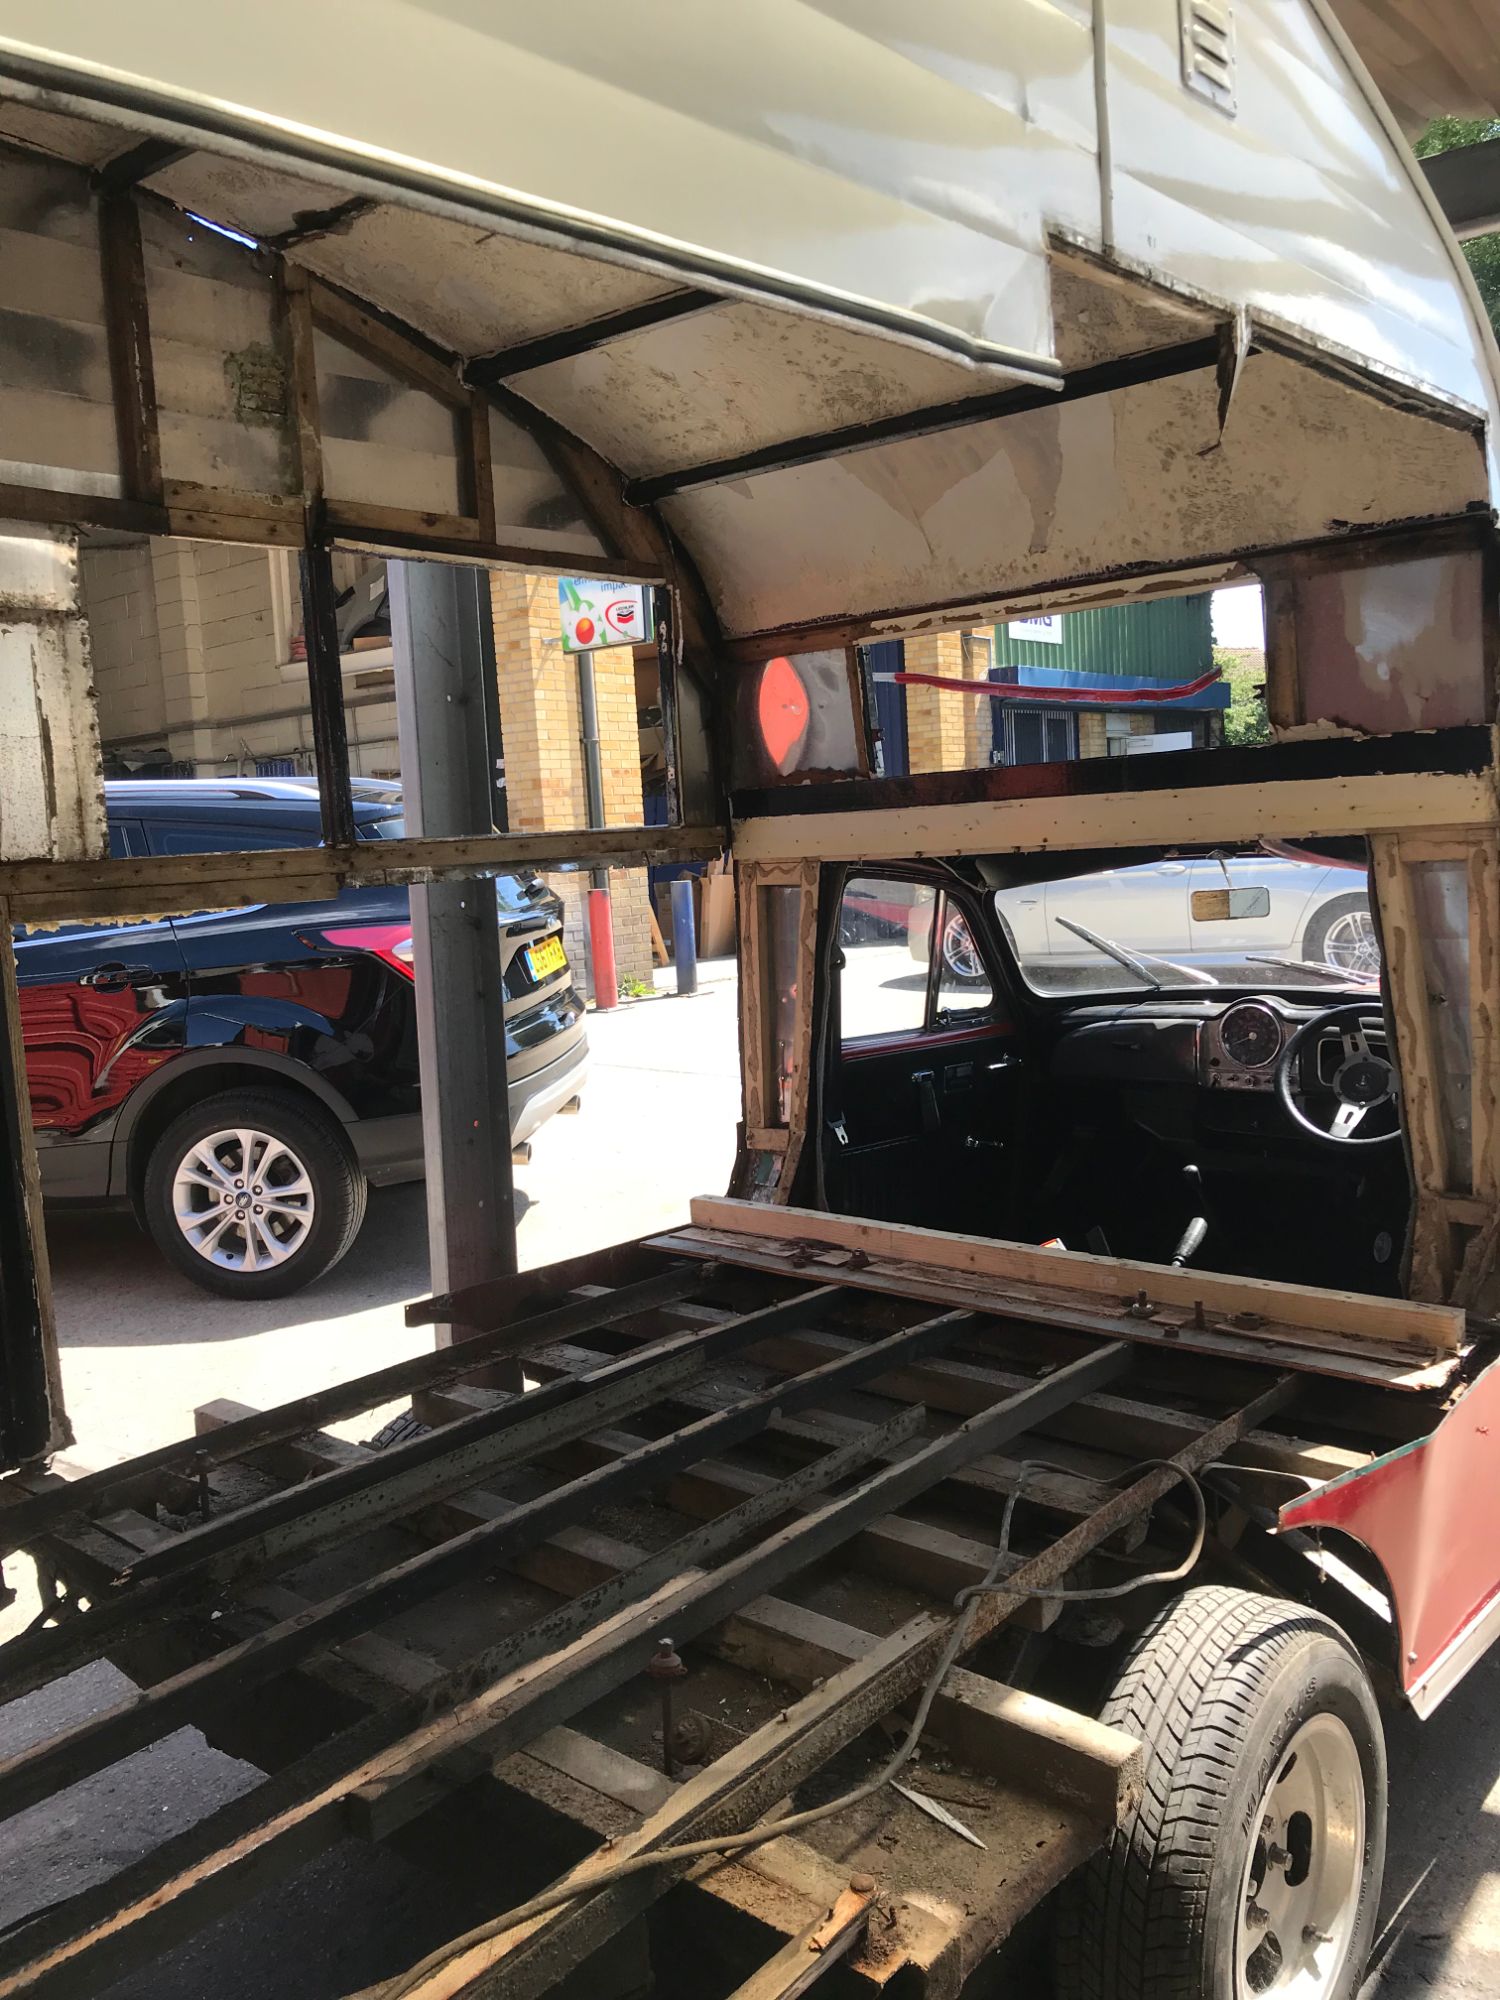
A new day and renewed energy that Billy will be the camper I dreamed of! The irons that extended the chassis were replaced with stronger ones. I wire brushed and treated all the remaining old metalwork. And the new metal floor was fixed to the chassis, with strengthened fixings between the rear and the front cab, and further reinforced underneath with a framework of irons. At last Billy was level, and was now stronger and more secure than ever.
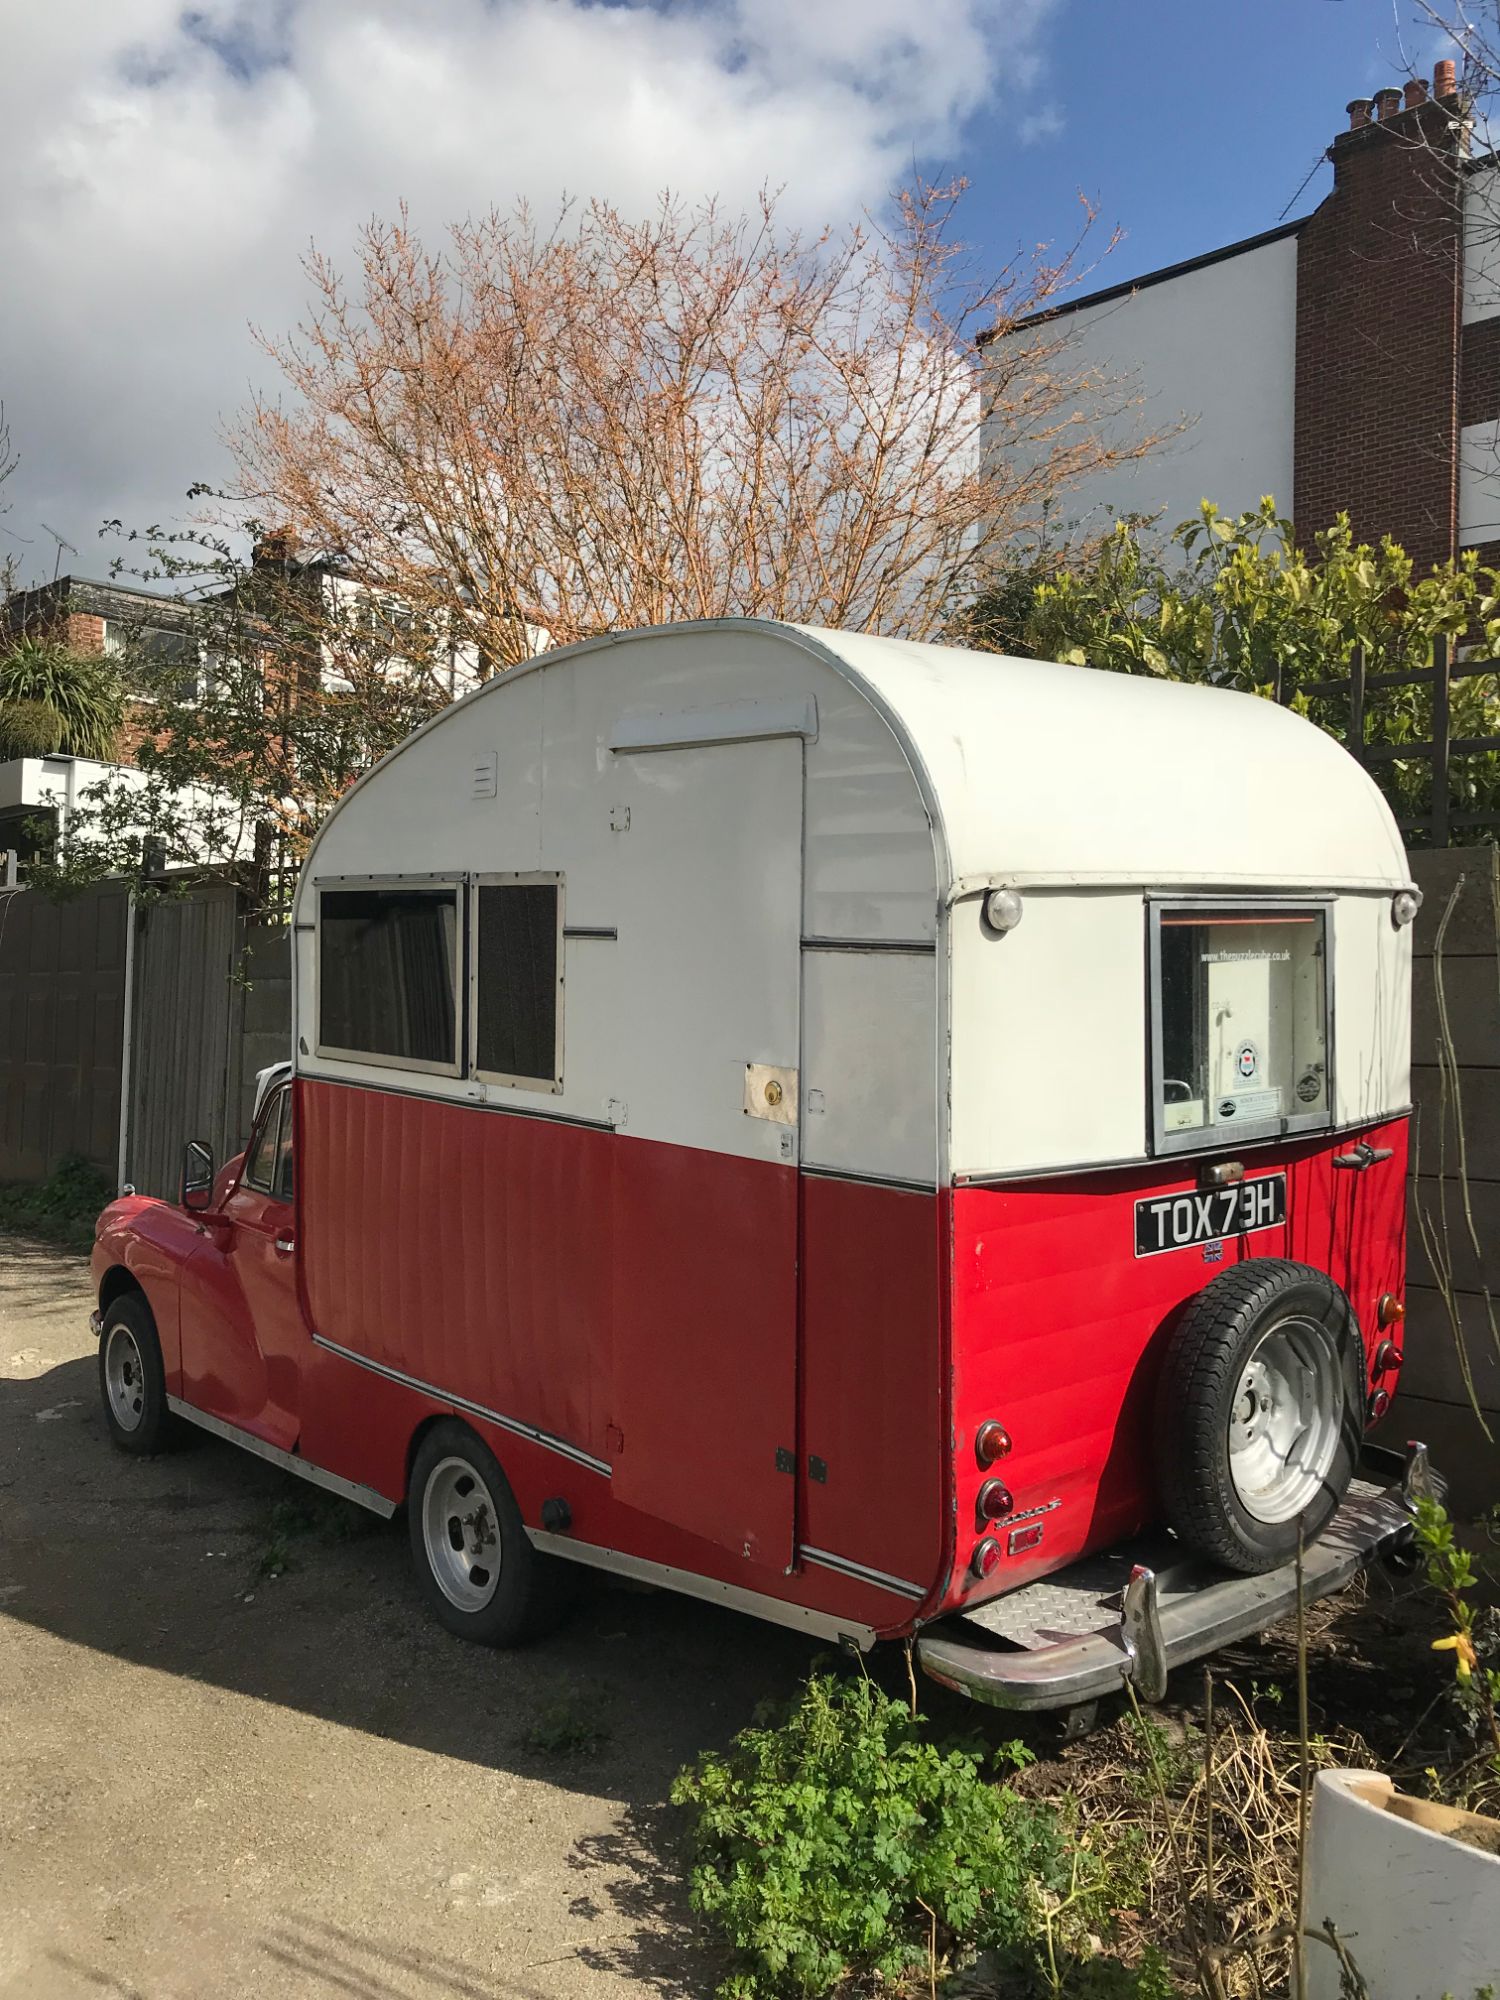
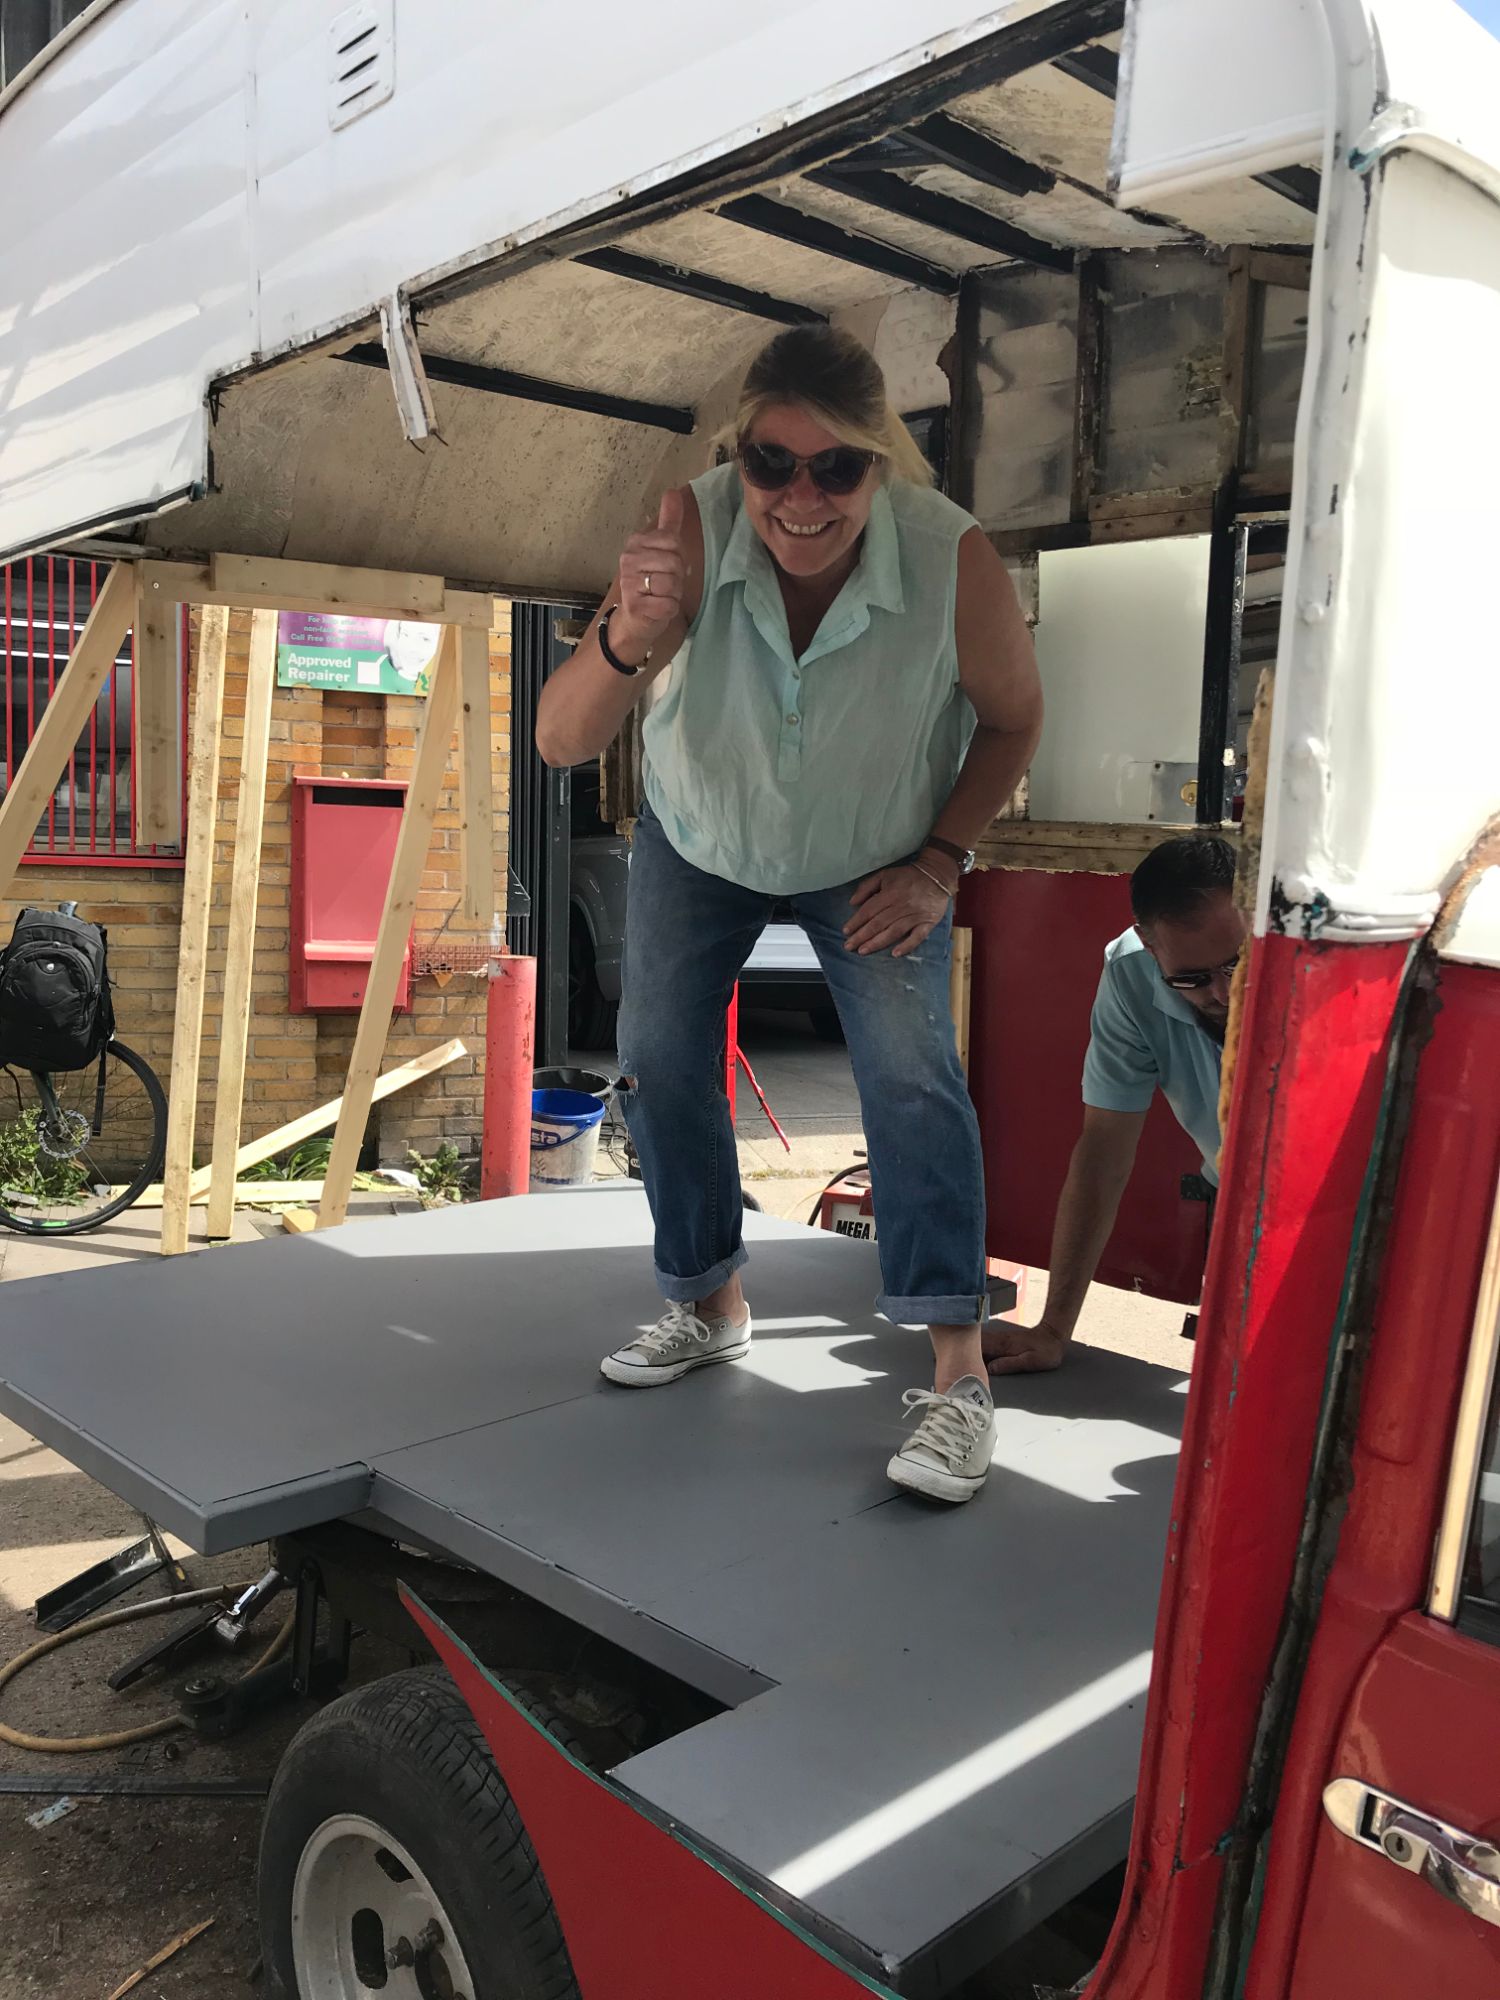
Once the new floor was in place the interior timber frame could be completed and the aluminium panels re-attached. I had taken a template of the panels to my local metal engineering workshop, and we recreated these with identical vertical ribbing, along with the curved and horizontally ribbed panels for the rear. I also cut the rear door to male it a stable door, and had both sections wrapped with ribbed panels, in line with the ribbing and flat panel on the main body of the rear.
I was over the moon that overall, I managed to save around two thirds of the original aluminium framework, improving the retained panels by beating out dents and filling holes. And now at last I could get the old windows back in, having refurbished them, stripped them of layers of paint, and had them polished.
And now I could move on to completing the interior!